

Switchblade Antenna Instructions
Large print instructions can be found on our website at INSTYCONNECT.COM under the Help -> Install Guides menu.
Page 1
The SwitchBlade Binoculars come with:
- Modem Housing Body with "Insty" on the side
- 4 Blade Antennas
- 10 screws (8 are needed, 2 are extra)
The switchblade can be setup in 2 different variations depending the primary carrier you use. Follow the instructions below based on your carrier.

Default Antenna Orientation & Insty.Online, T-Mobile
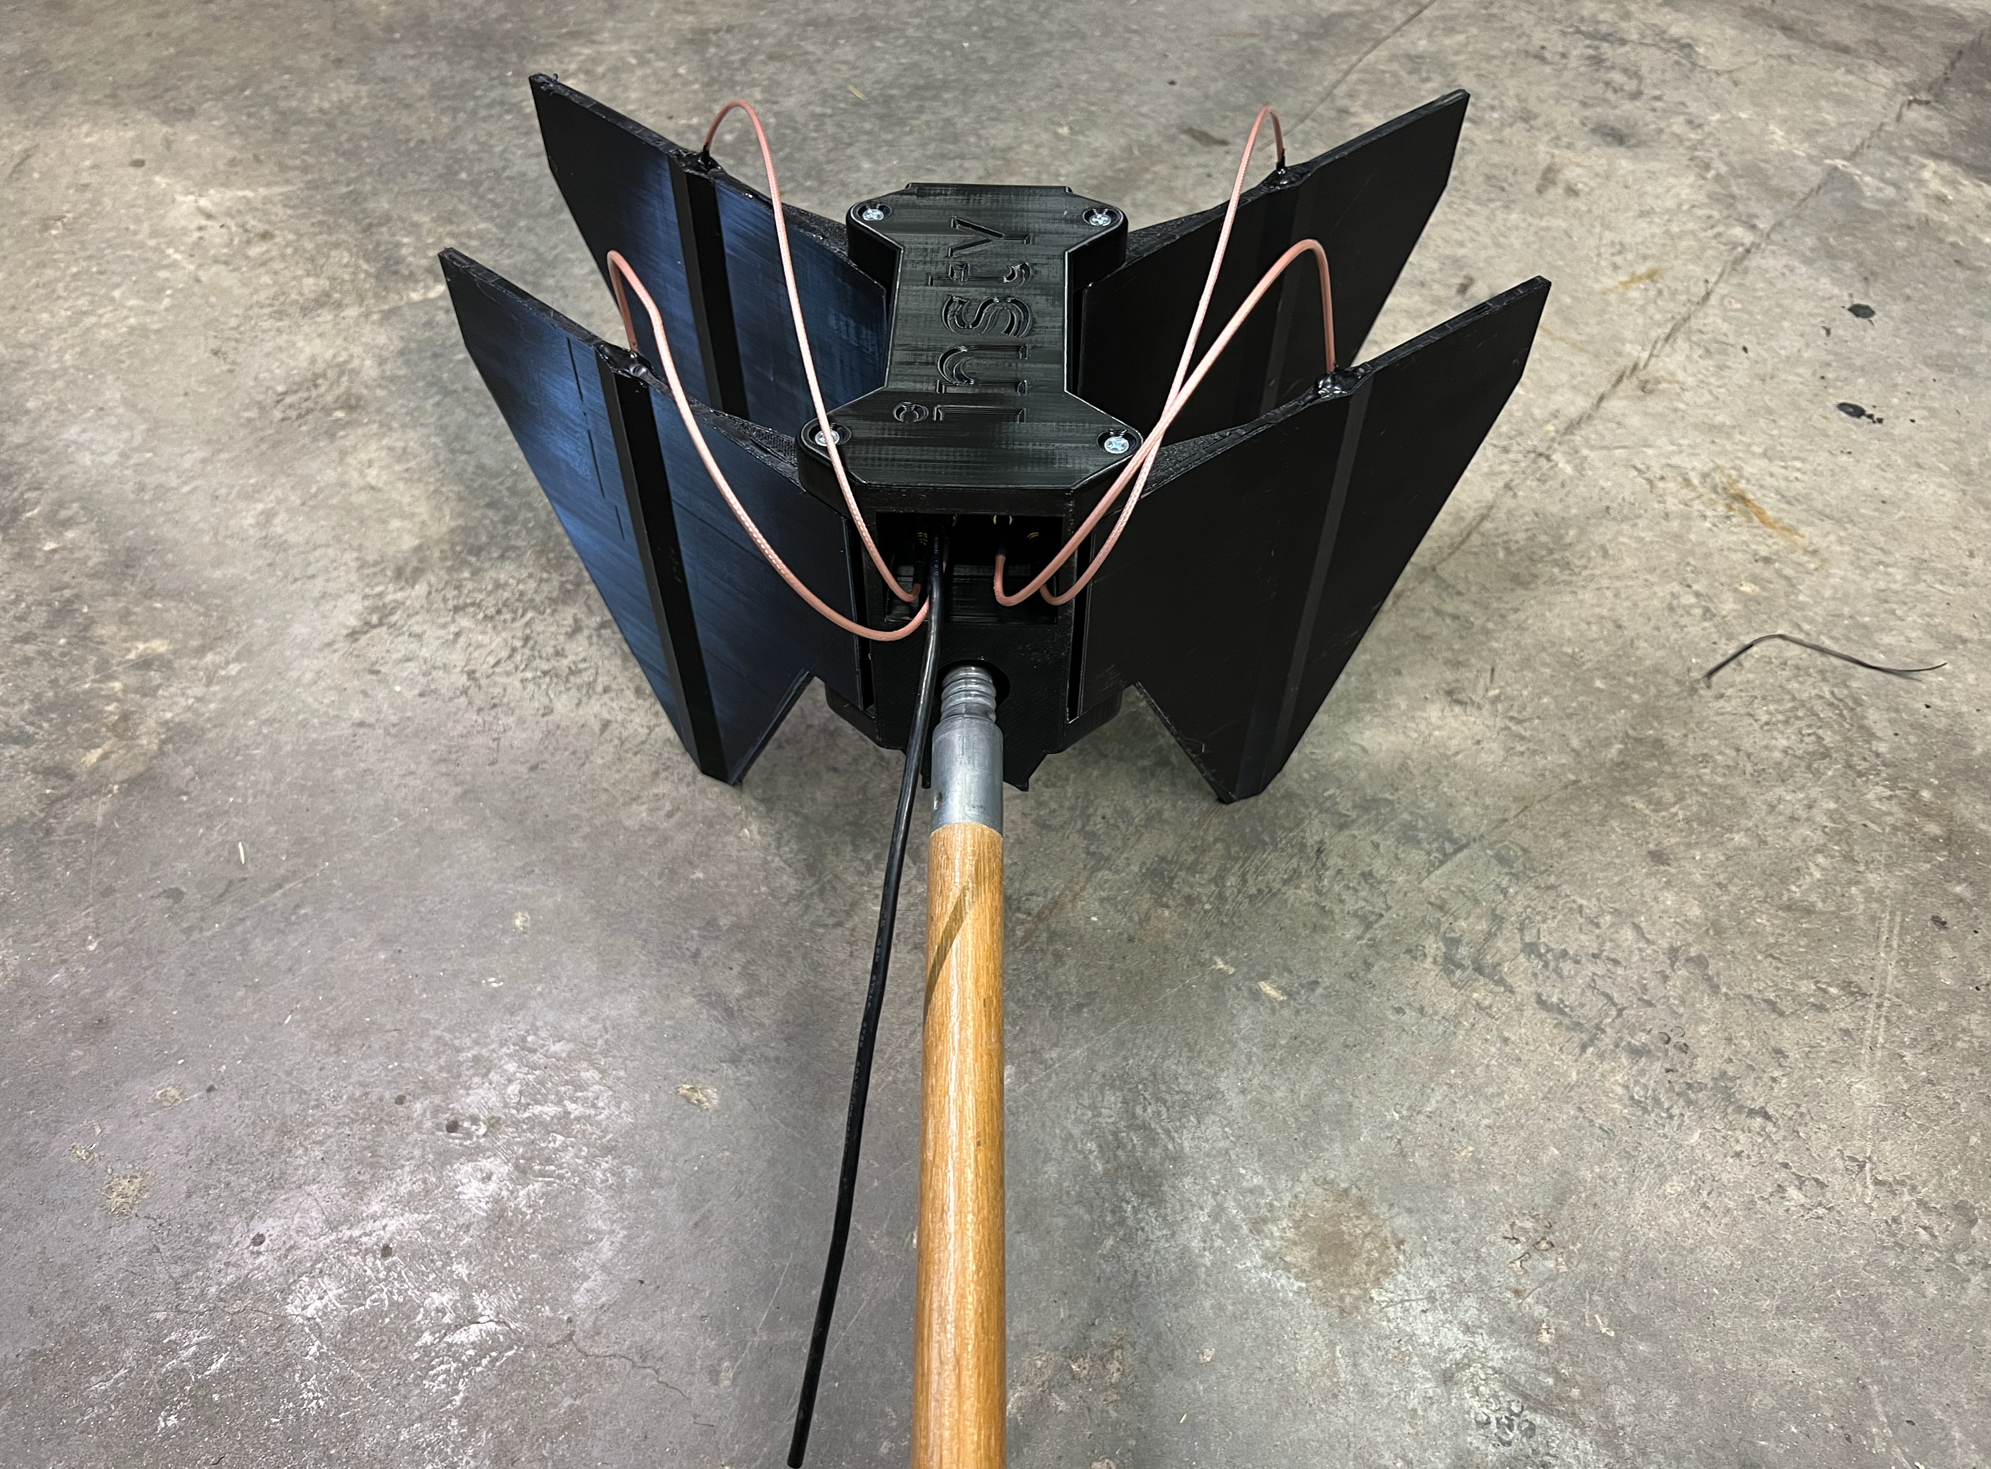
Install blades as pictured. In this orientation, when the blades are deployed, they will be in an X formation. This is the default configuration.
If you want to use your Switchblade for multiple providers, this is the orientation that works well for all.
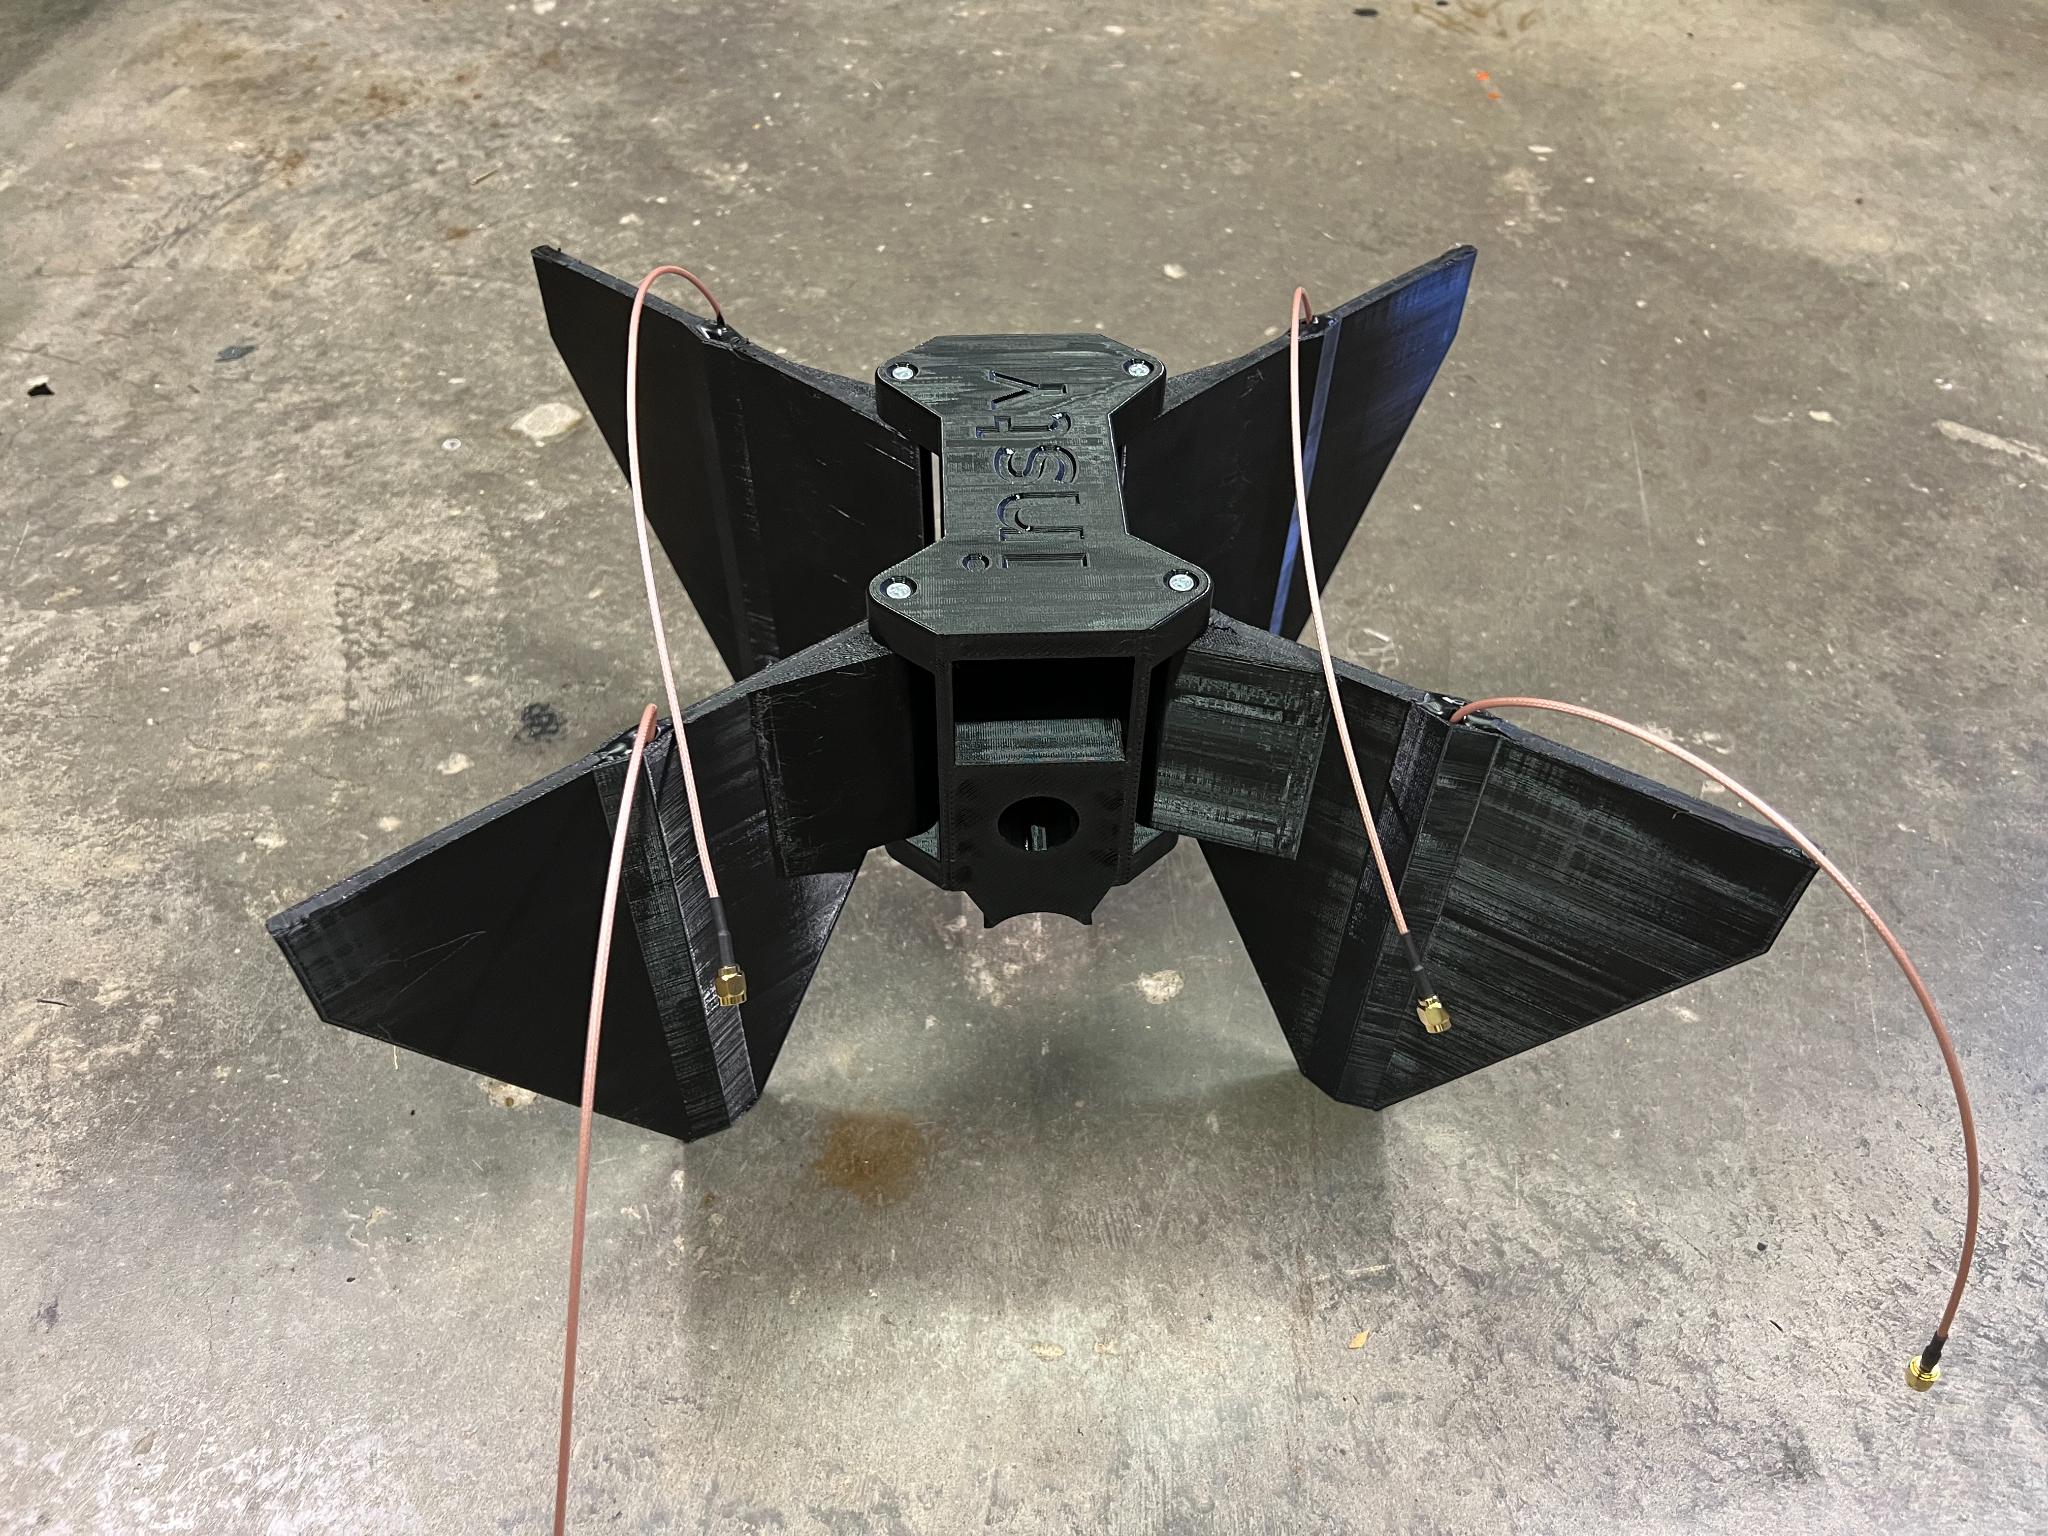
Antenna in the X formation
Antenna Orientation for Verizon and At&t
Install blades so they will fold UP as pictured. In this orientation, the blades will be able to fold down 45 degrees and will be a V formation when deployed.
This gives marginally better performance on Verizon and At&t.
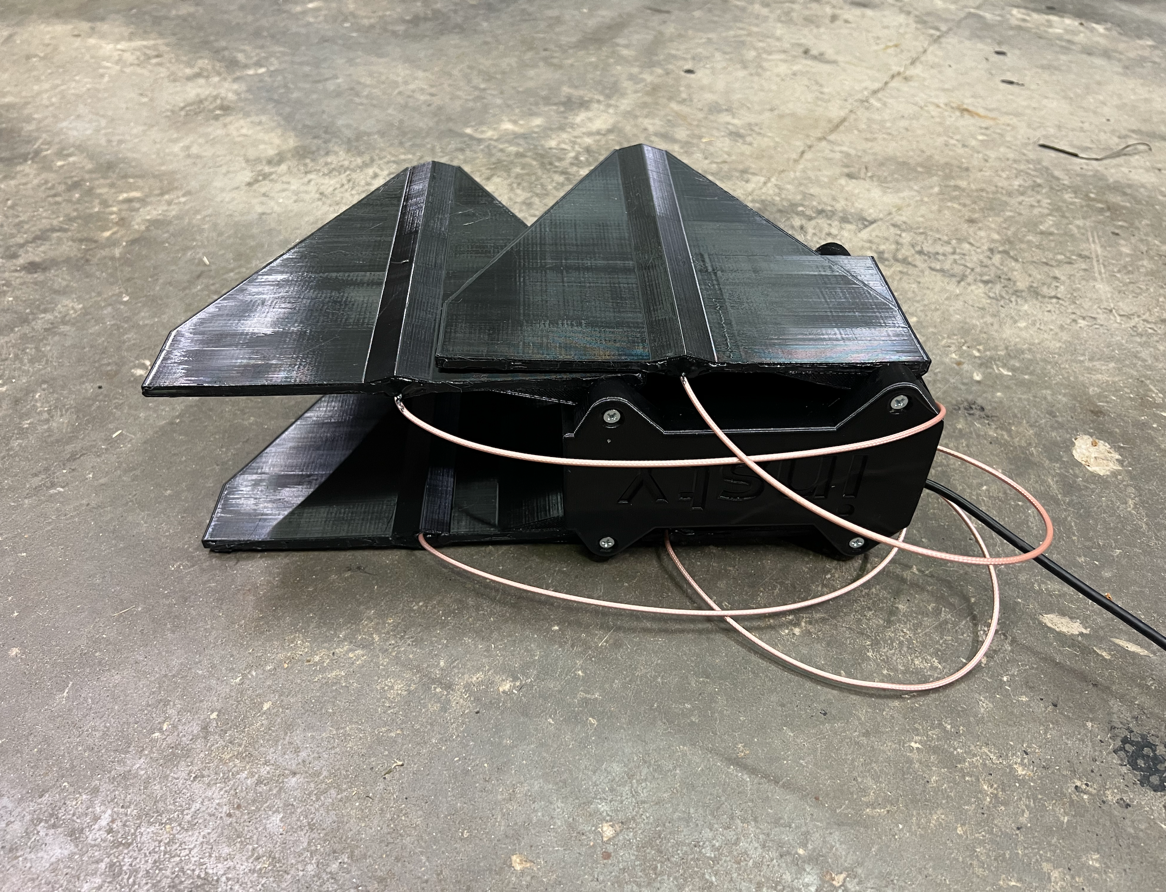
Blades in the folded and stored position.
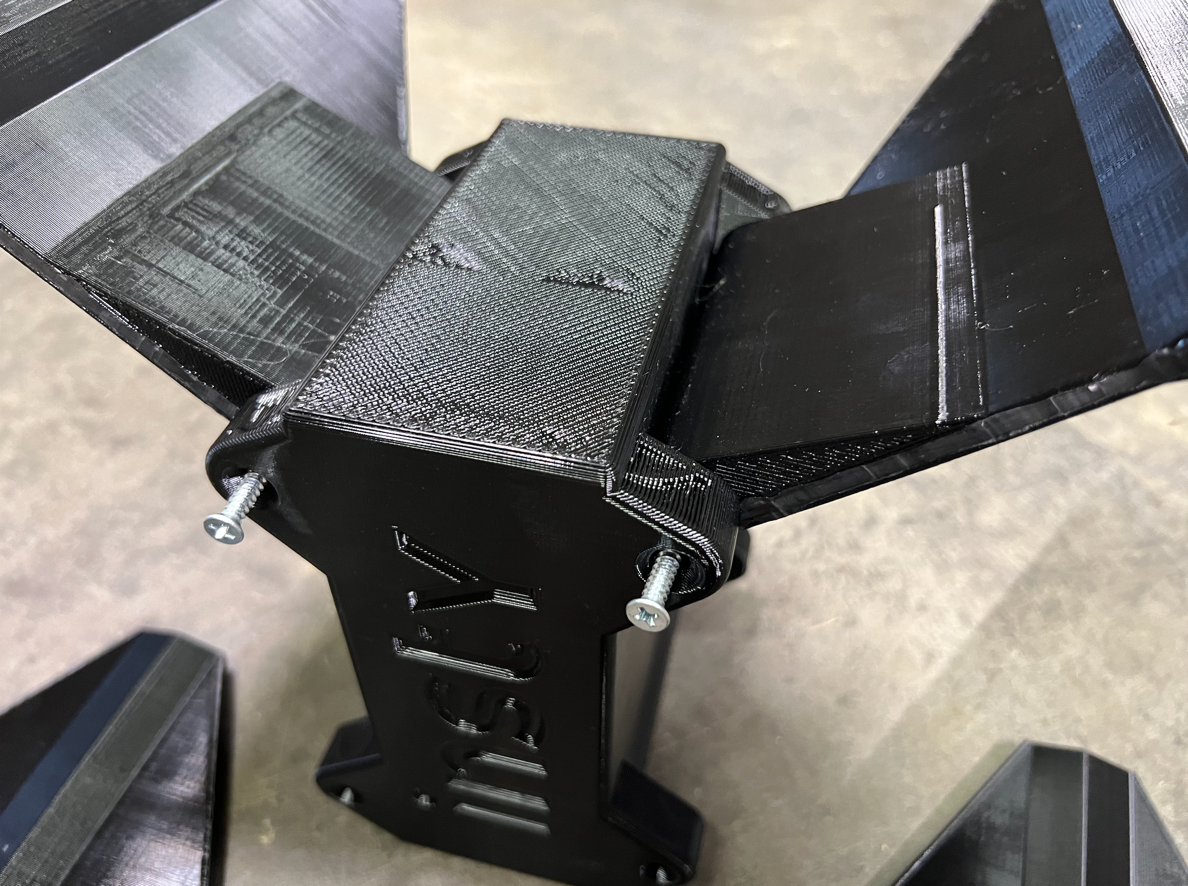
After you chose your orientation, use the included screws to attach blade antennas.
Insert included phillips head screw into the modem housing while holding on to the blade antenna. (see pics above) Shift the blade until the screw finds the hole on the blade, then use a phillips head screwdriver to fasten the blade to the modem housing. Do not overtighten the screw, snug is all you need.
Use all 8 screws to fasten the blades on both sides of the modem housing. After tightening screws, try collapsing the blades in. They should fold and stay folded up. If they flop around, try tighteninng the screws a little bit more. You may have to check and tighten the screws from time to time.
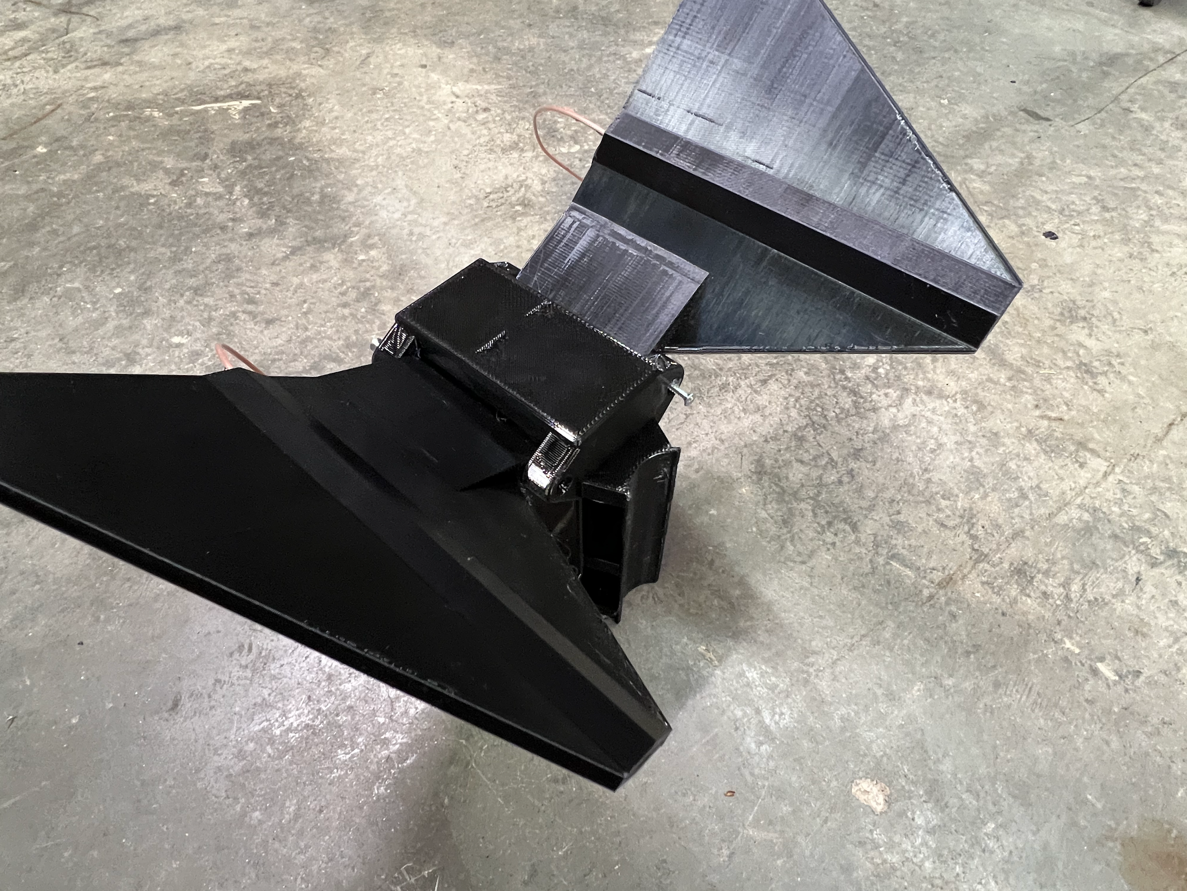
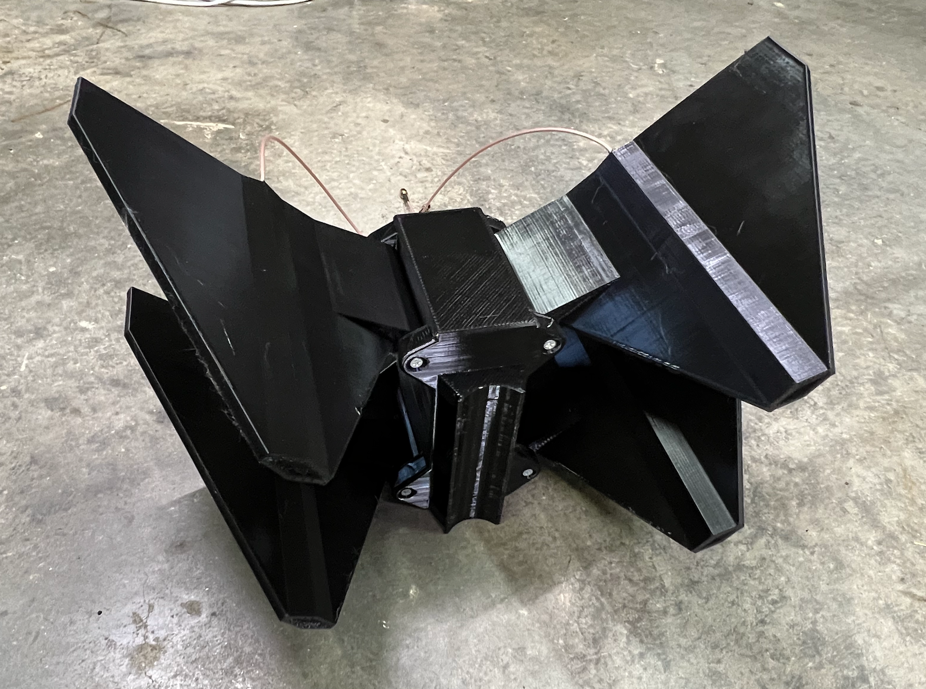
Blades in the deployed position with blades up at 45 degrees in V formation.
Page 2
SwitchBlade Antenna Wires
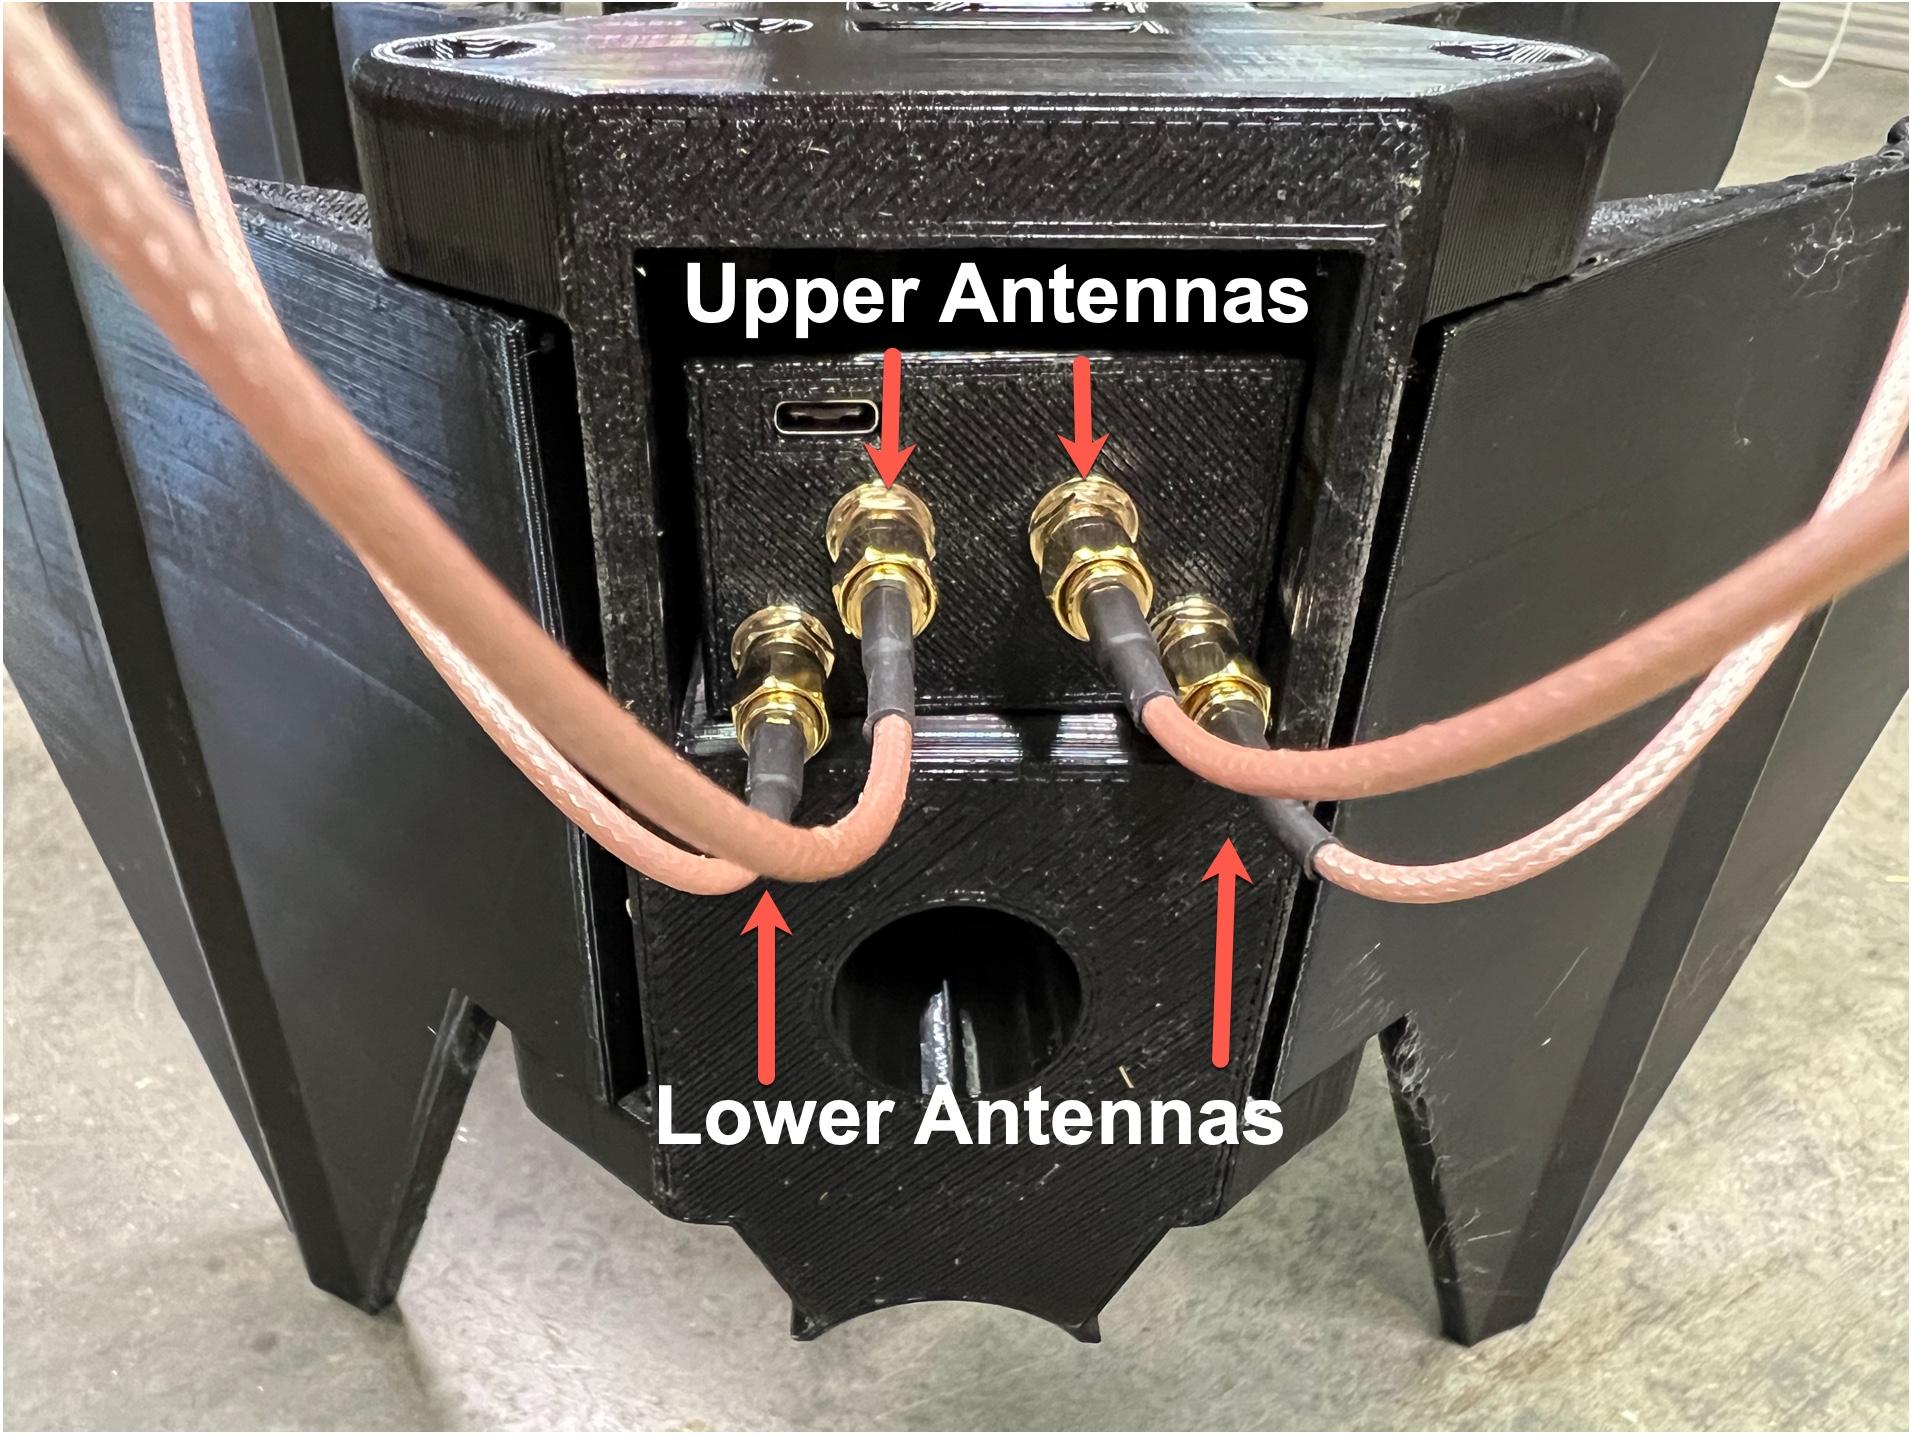
USB Modem and Antenna Wires:
Insert modem with USB port on the same side as the "Insty" logo.
Attach upper antenna blades to the inner antenna ports.
Attach lower antenna blades to the outer antenna ports.
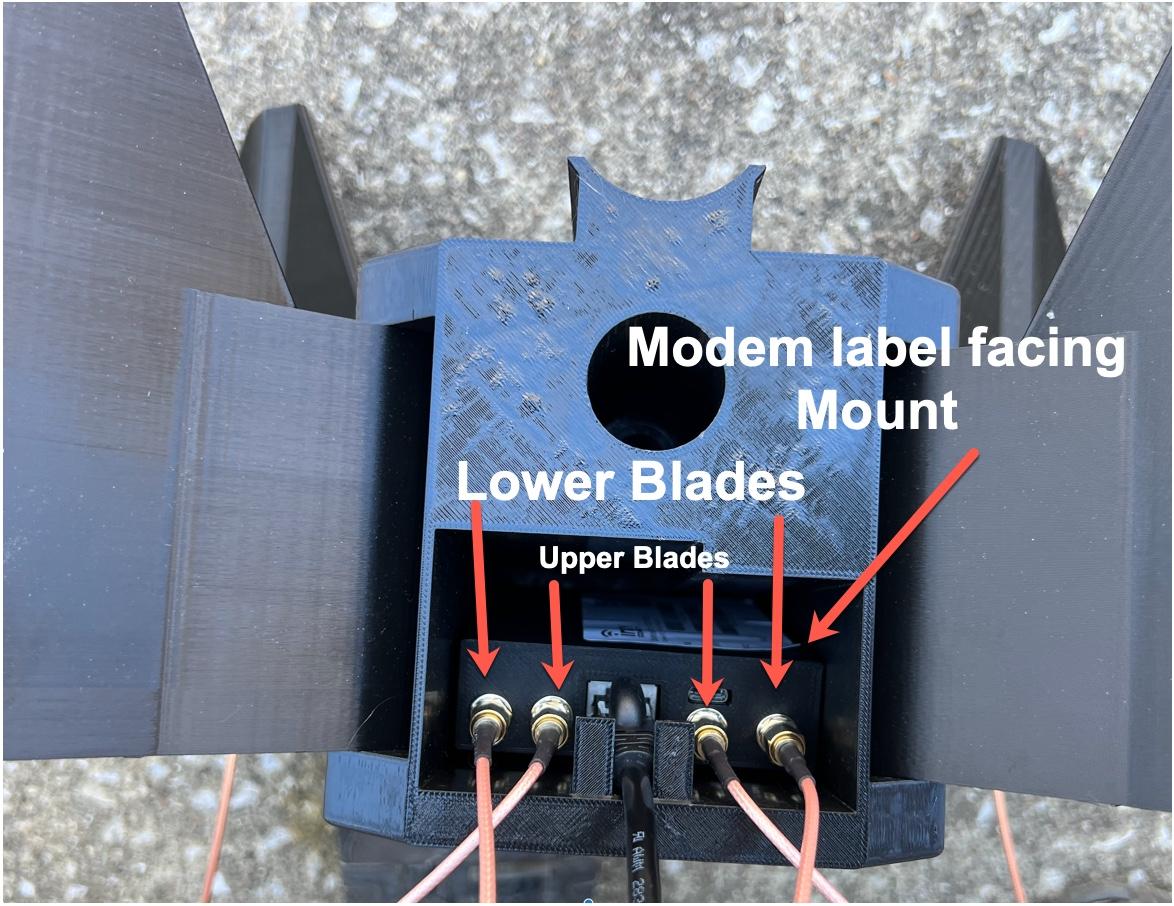
POE Modem and Antenna Wires:
Insert modem with the label facing the mount side of the Switchblade.
Attach upper antenna blades to the inner antenna ports.
Attach lower antenna blades to the outer antenna ports.
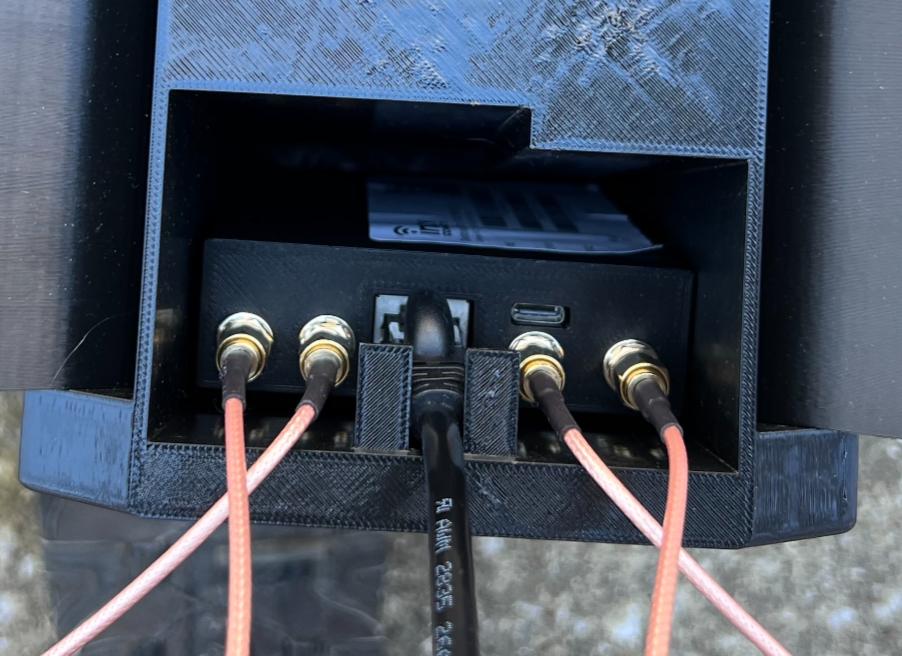
Run the USB or POE cable through the plastic holder and pull down to lock it into place.
*Important - the Switchblade must be vertical at all times when using outdoors.
Page 3
Switchblade Mounting Options
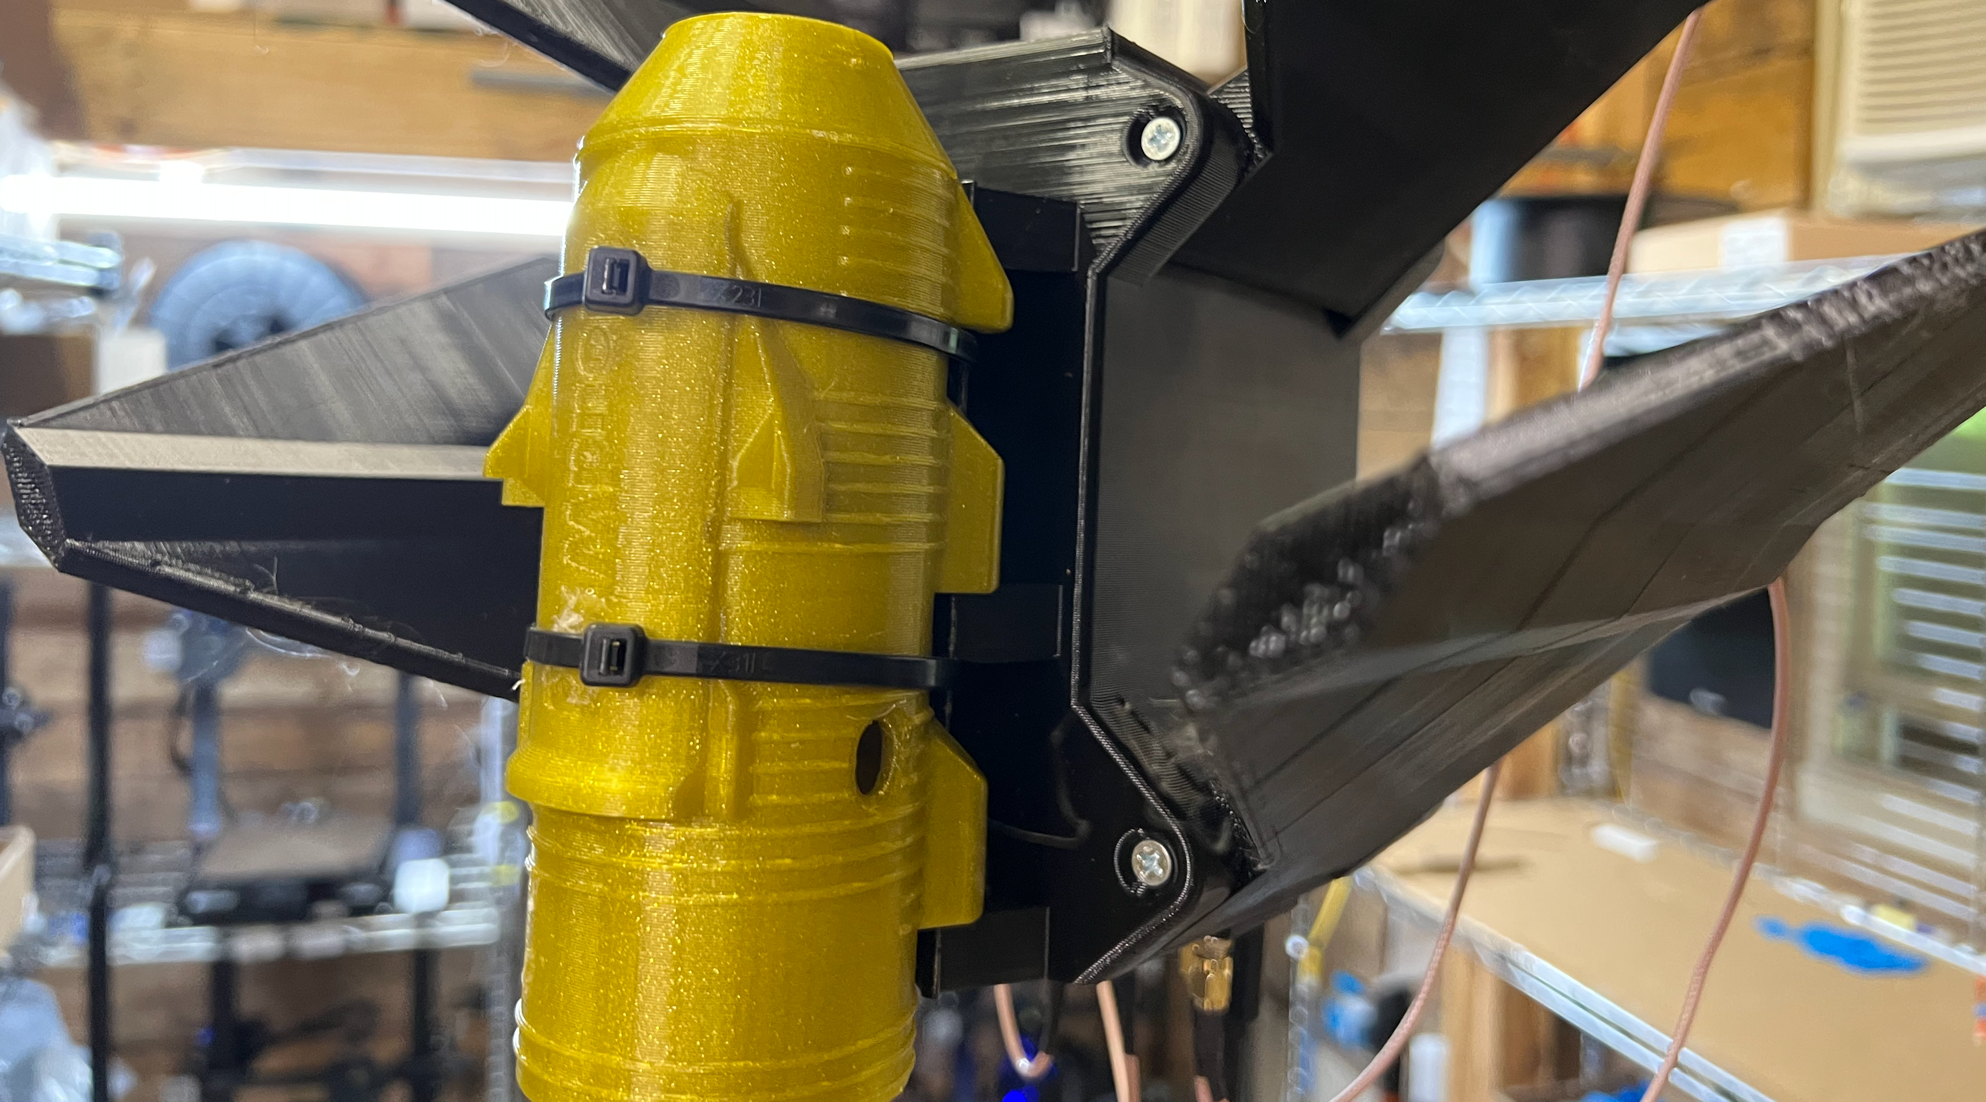
We included an insert for a painters stick or broomhandle that utilizes the standard thread. You can hand tighten the stick in 'snug'.
You can also use the round 'flange' to zip tie to any pole that's between 1" - 2" Round. Be sure to use strong ZIP ties or hose clamps.
Also Flag Pole Buddy (FlagPoleBuddy.com) has an Insty specialized mount adapter that is compatable with the Switchblade. Be sure to use zip ties when using the adapter as well.
How to Aim Switchblade
Easy way: Start with antenna pointing to the North. Wait 2 minutes and run a speed test. After 2 minutes, point antenna to the East, wait 2 minutes and run a speed test. After 2 minutes, point south, wait 2 minutes and run a speed test. Repeat until back at the North. After this, you should know where the speeds are around you.
For a more detailed instruction on how to aim using the signal strength and band scanning, head to YouTube and search for "how to aim binoculars" on the Insty Connect YouTube channel.