
Insty Connect POE Setup and Configure Instructions
Setting up the system.
We recommend assembling and configuring the system on a table or desk before you permanently install any of the components. Follow the steps in this document to ensure you have internet connectivity, and then plan your install.
Unpack all components
Antenna and Modem parts:
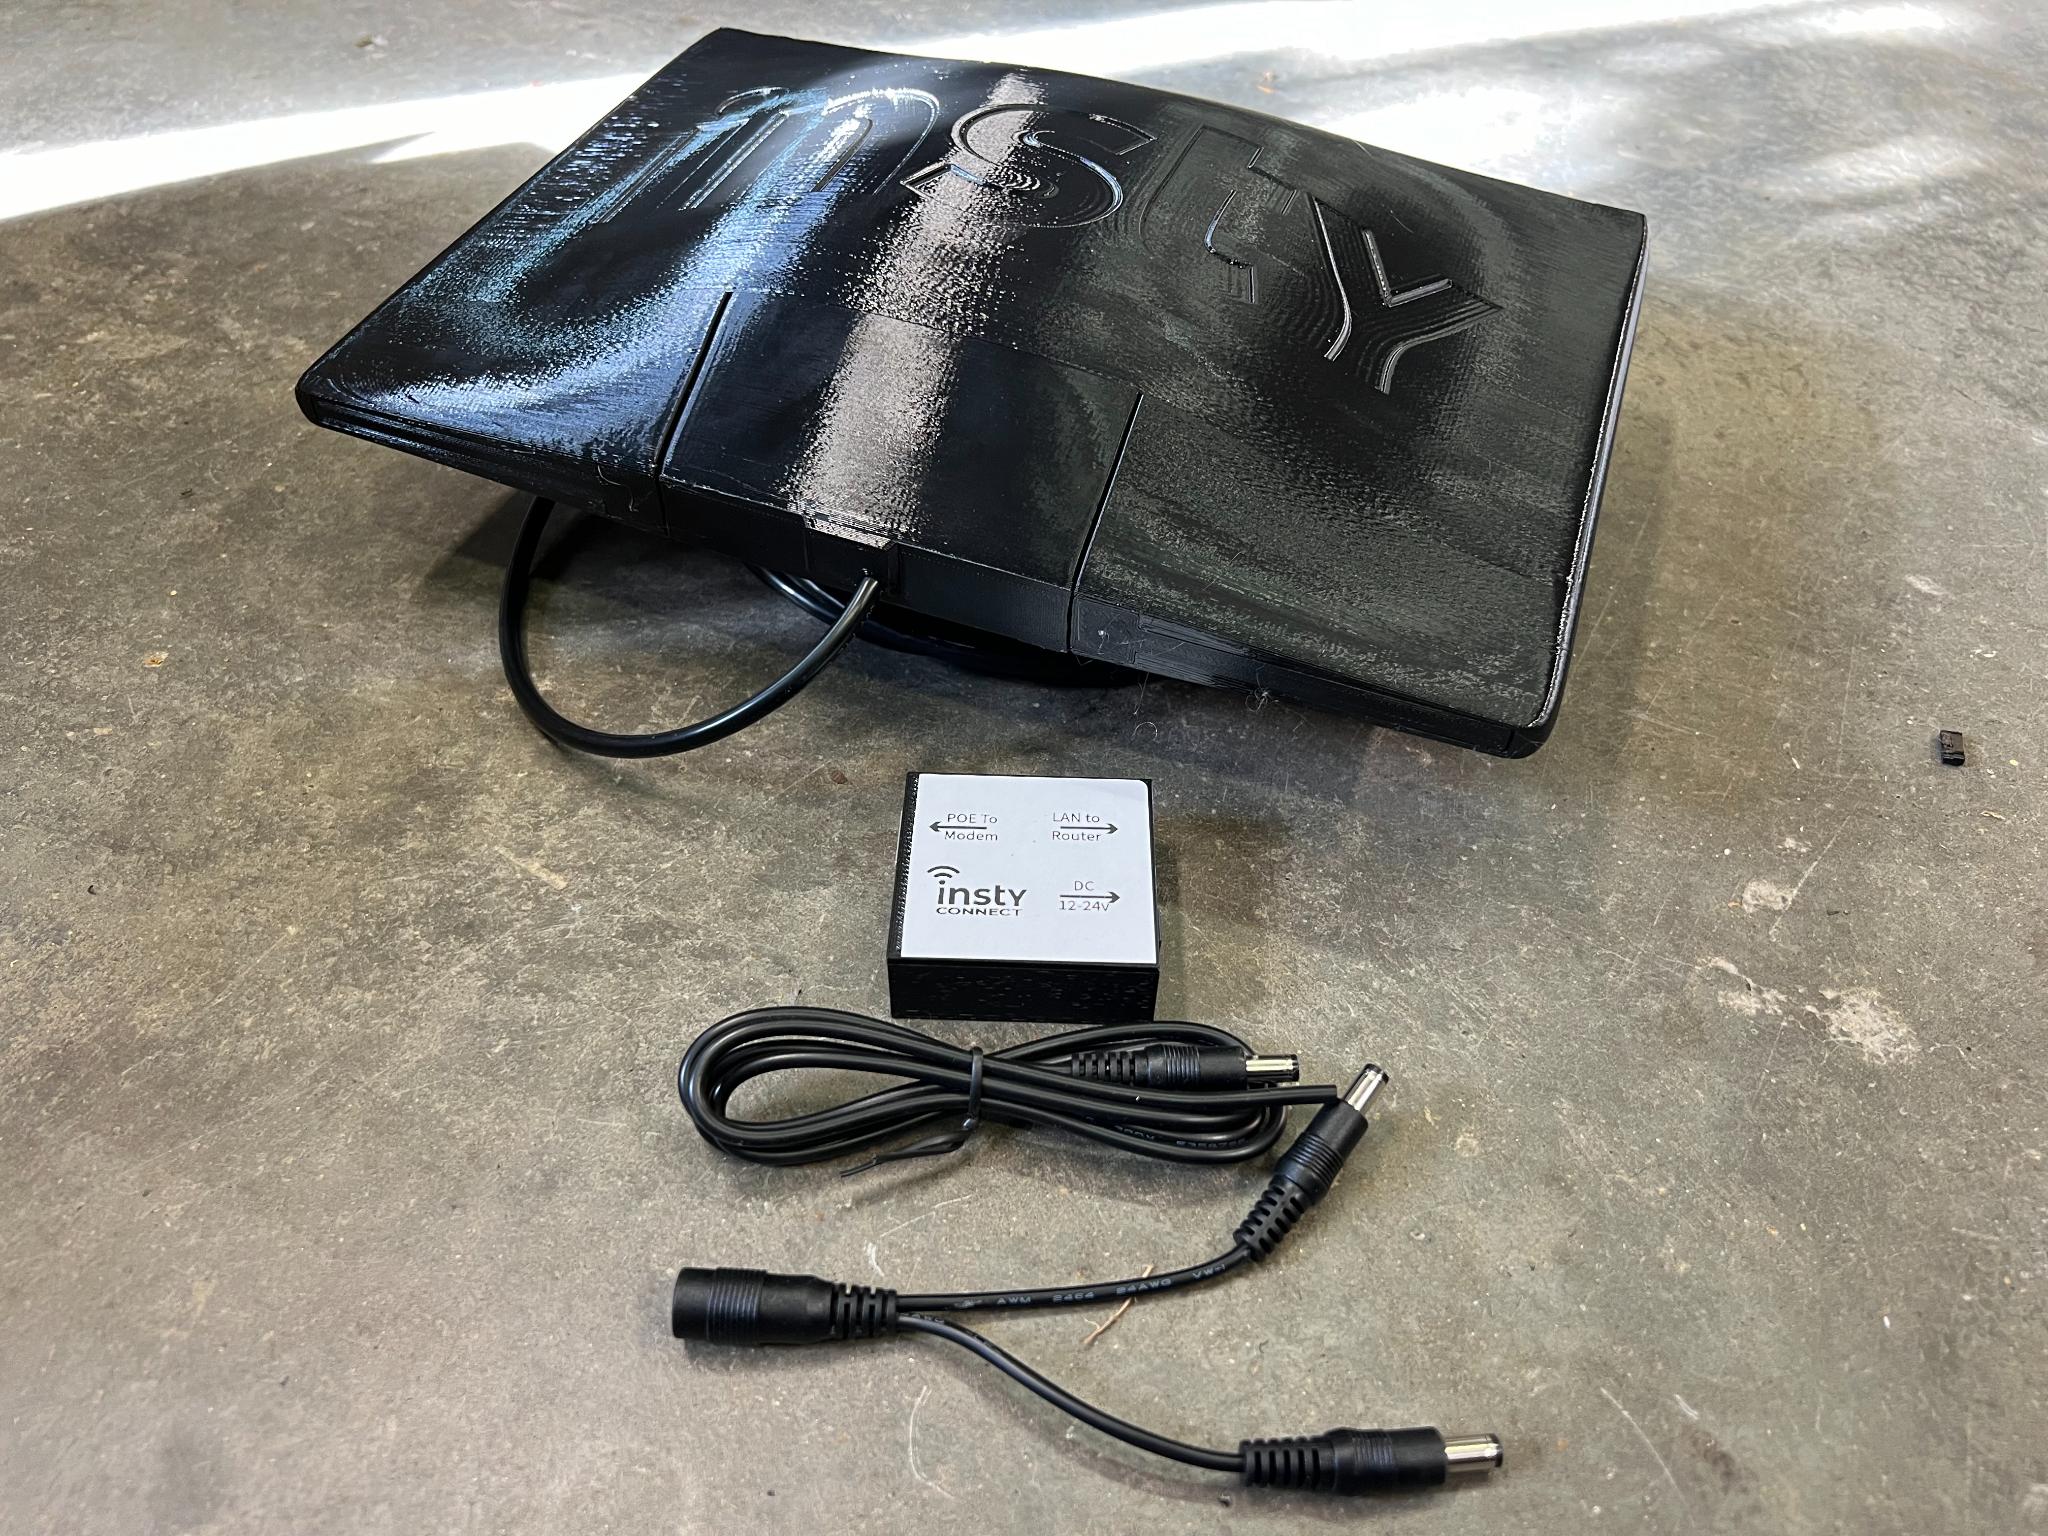
- The Squared antenna with modem box enclosure with the antenna ports and SIM slots.
- The POE Injector Box
- Direct wire cable
- 'Y' pigtail
- Short ethernet cable
- Long ethernet cable
Router Parts:
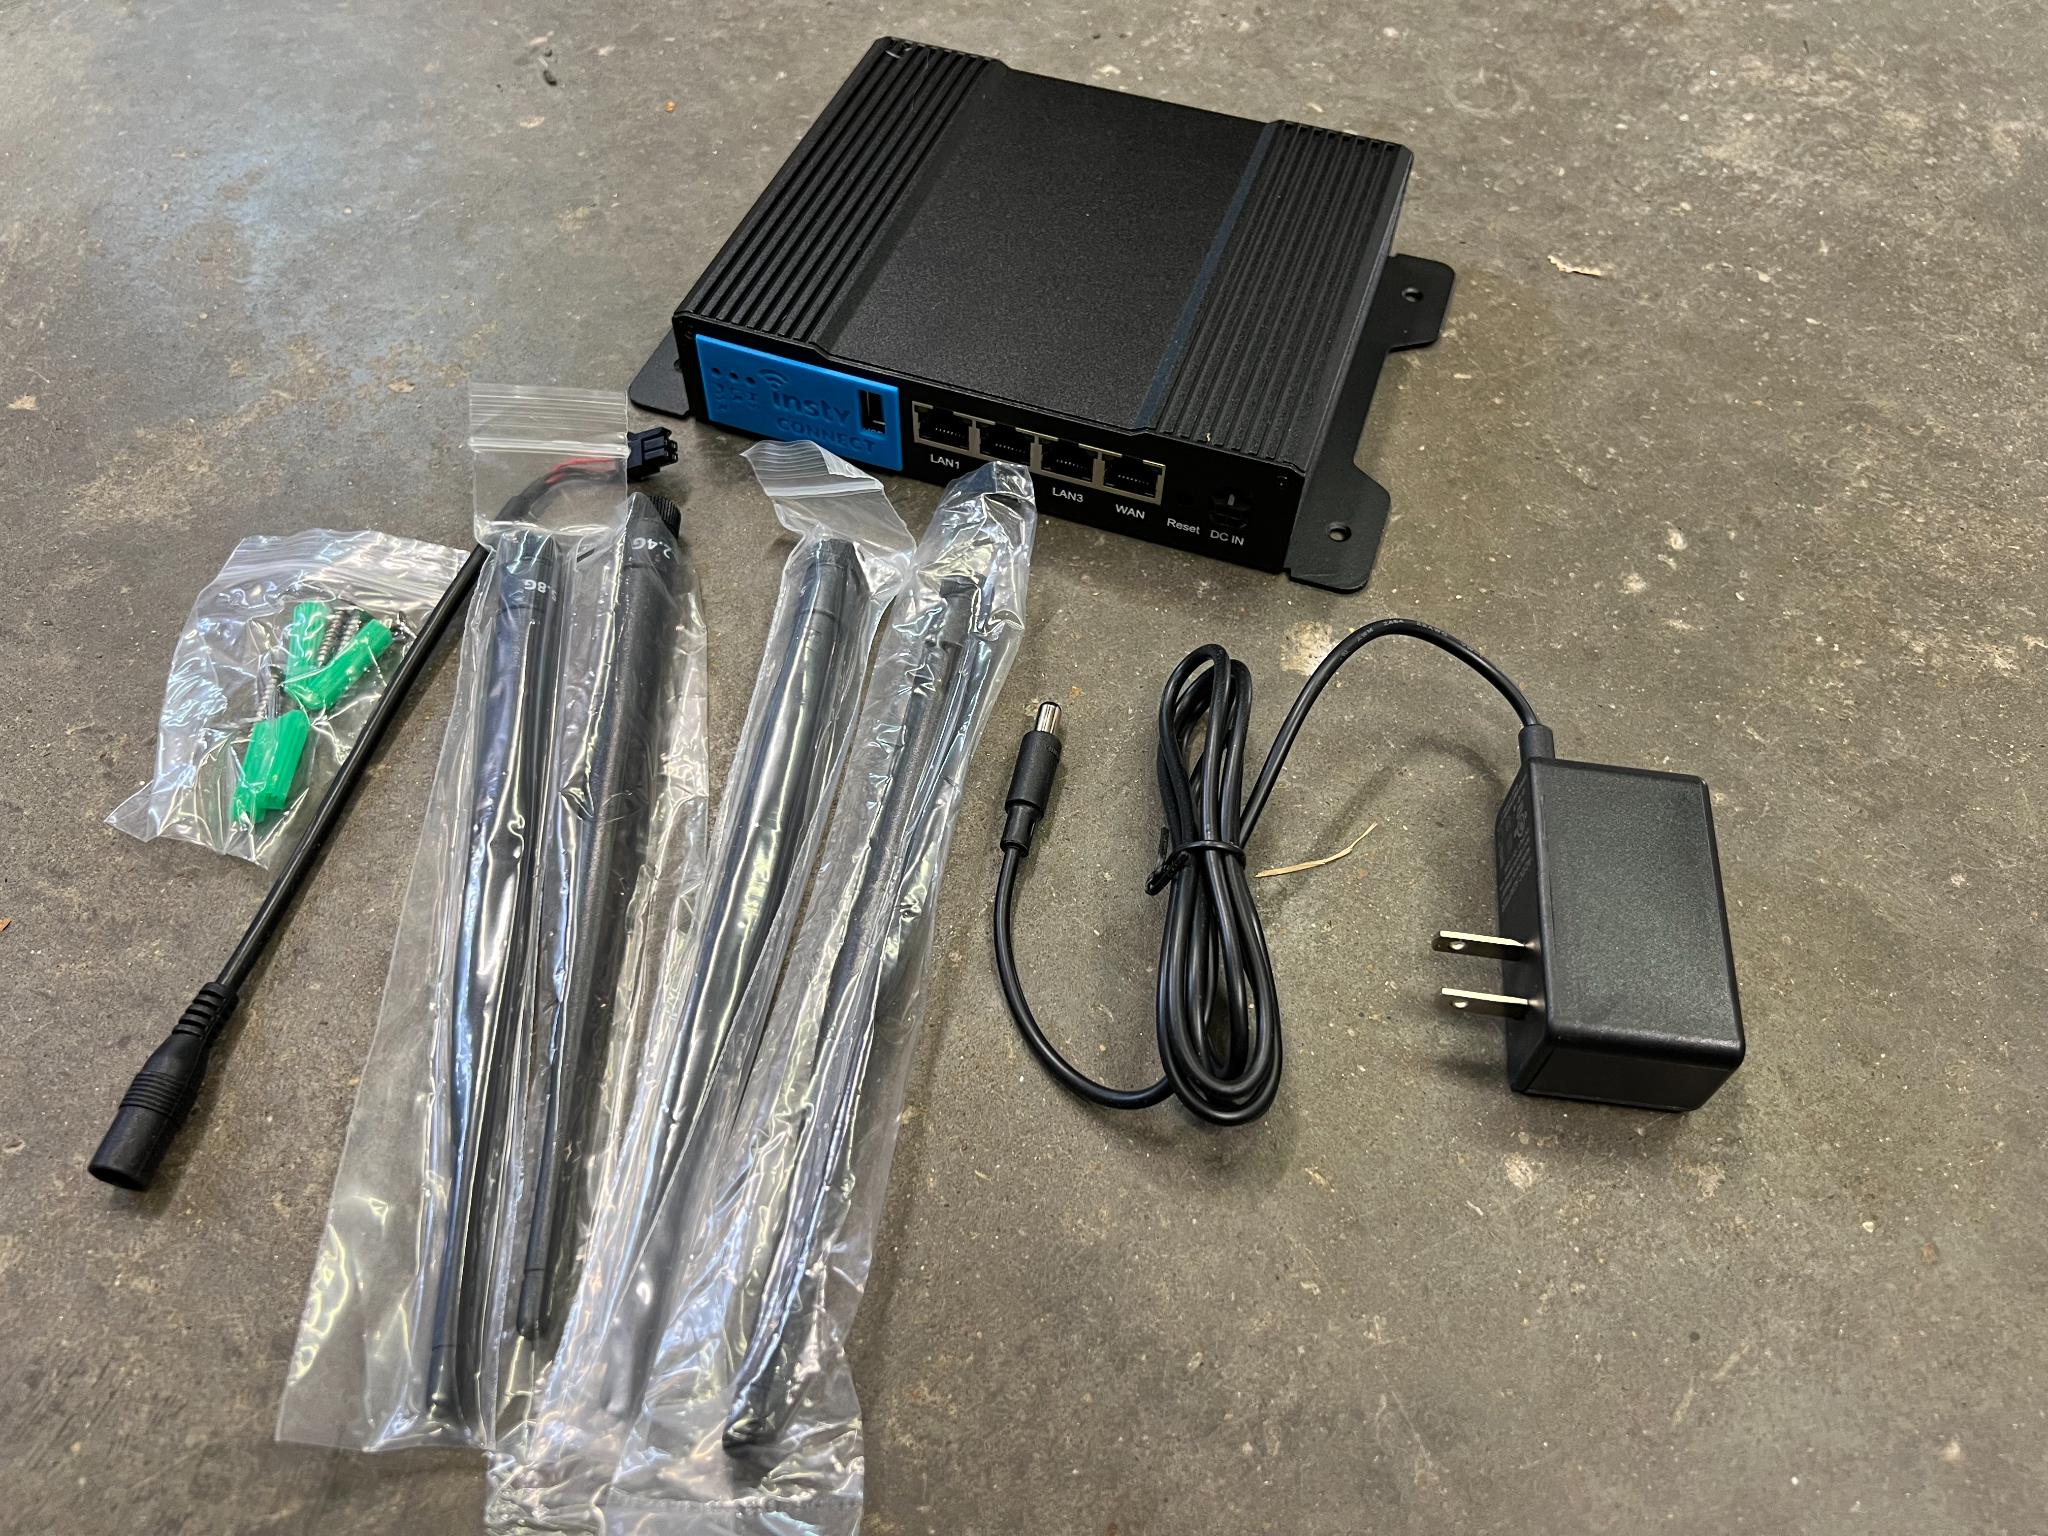
- The Insty Connect 2.4g and 5g Wifi Router
- Power Adapter
- Power "Pigtail" from dc barrel to Molex 4
- 4 Wifi Antennas
Assemble the Router
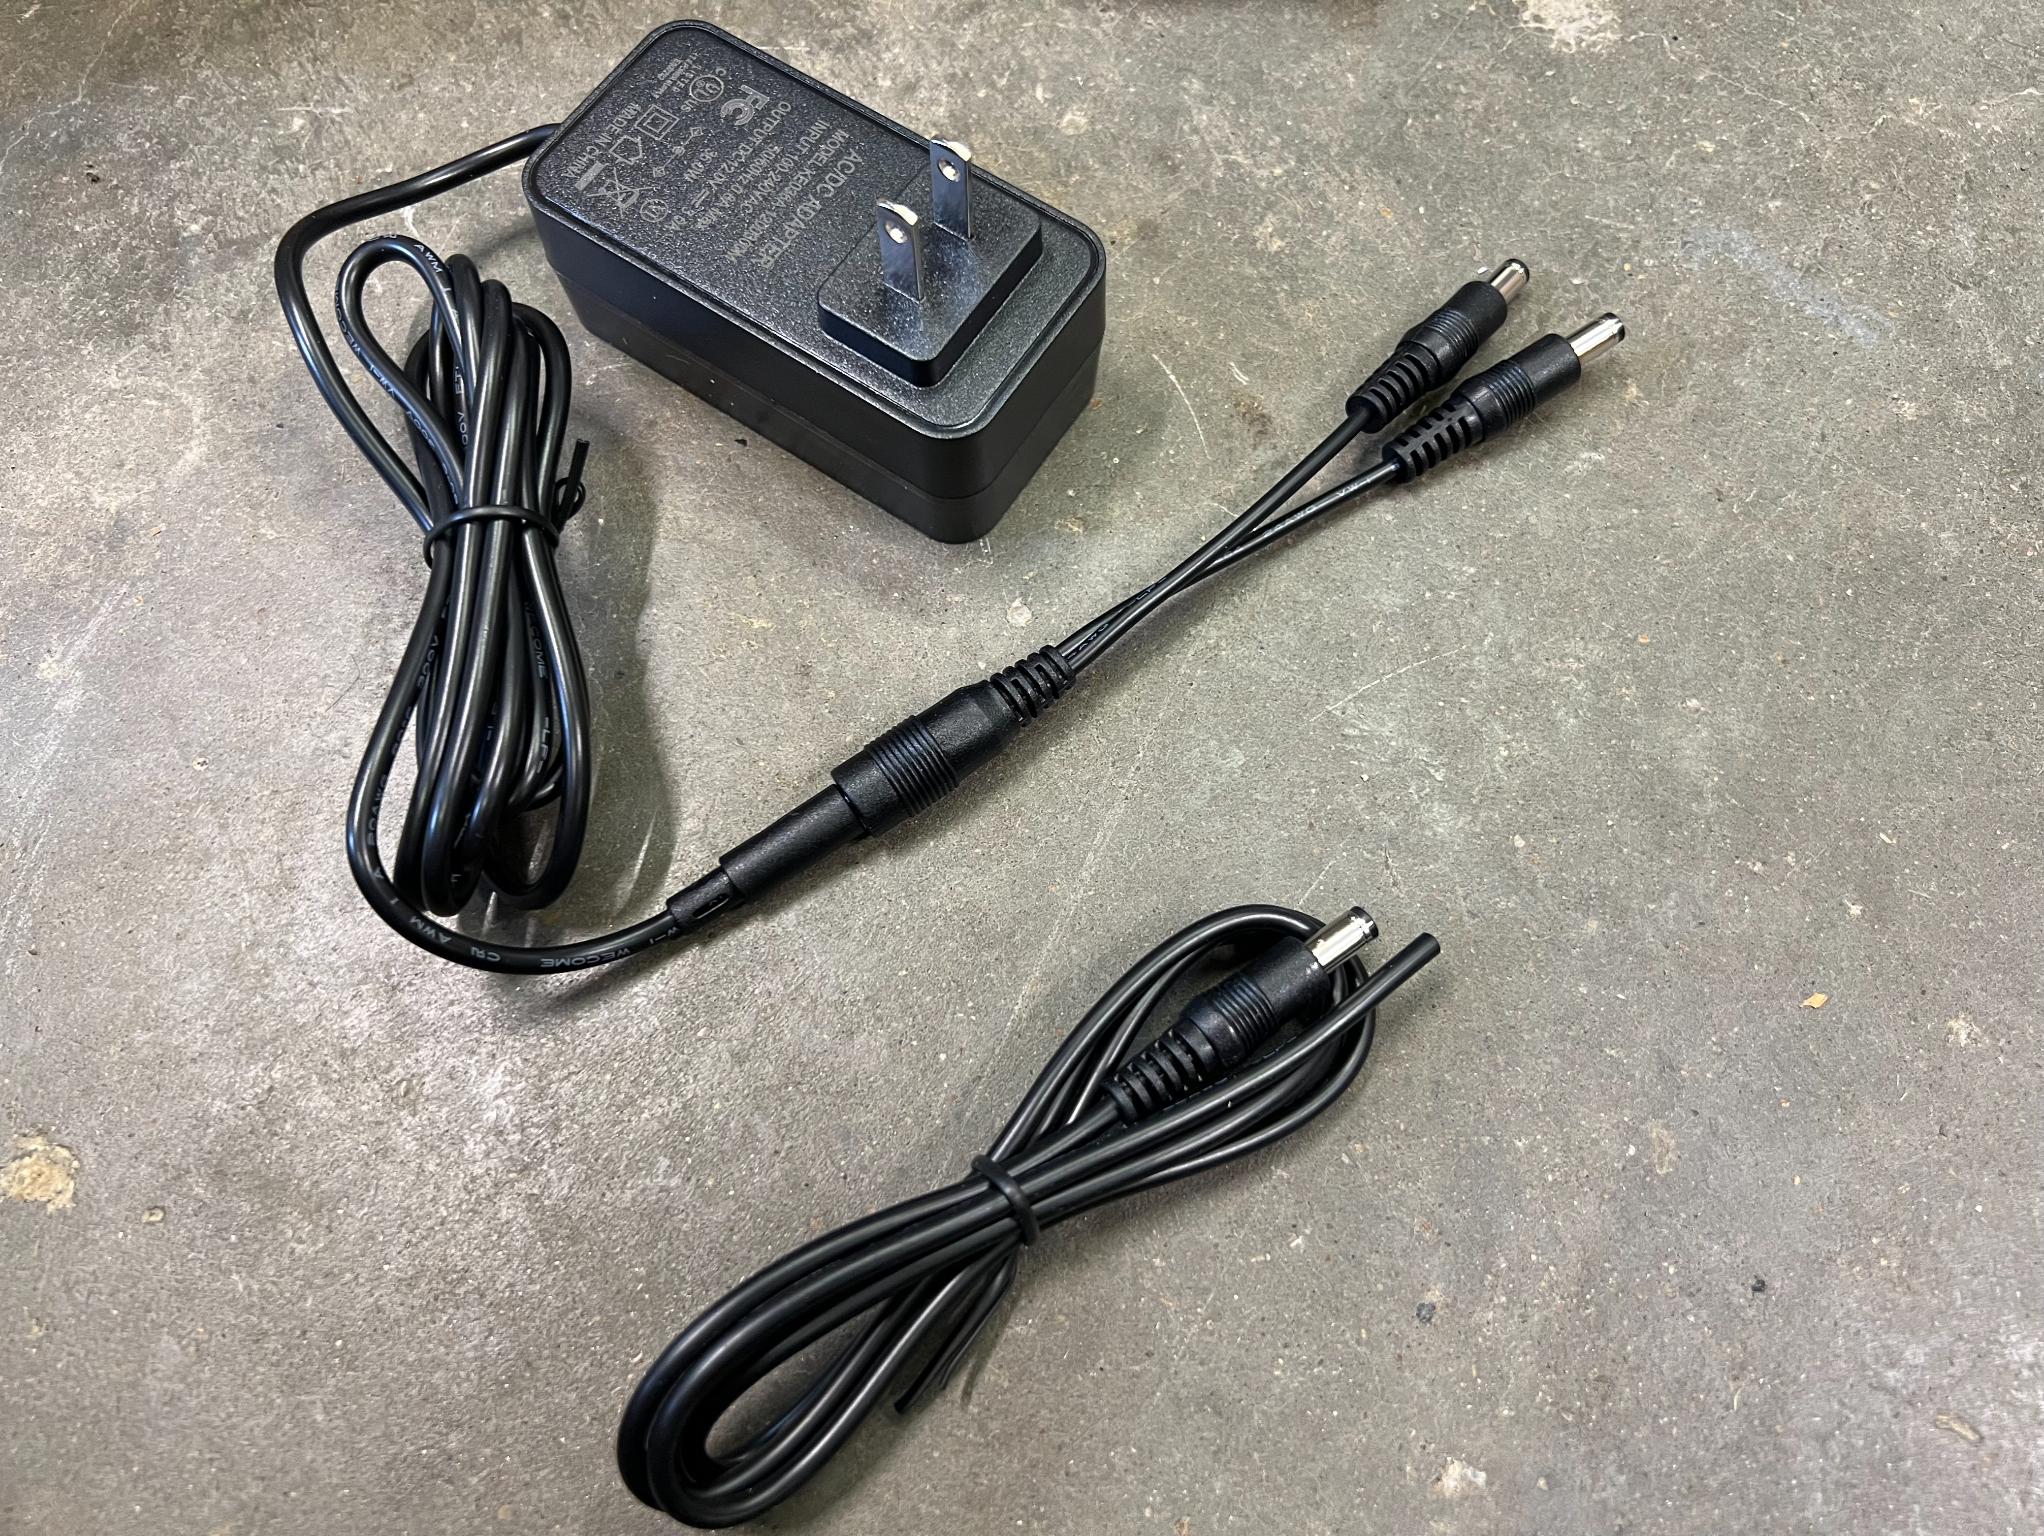
You can power the system with the included AC Wall adapter, or wiring it direct to 12-24v.
If you will be wiring direct to 12v, use the included direct wire dc barrel cable. The RED end is (+) positive, Black end is (-) Negative.
- Connect the Wifi Antennas to the rear of the router. Make sure to attach the 2.4 and the 5.0 to the correct ports.
- Connect the dc barrel power cable to the Y pigtail, and then plug one of the Y connectors to the dc barrel to Molex 4 pigtail, then to the Router's molex 4 power connector.
- After power is connected, wait for the lights on the front of the router. The red light is power indicator, the green lights are for LR and HS wifi. The green lights can be steady on or flashing (showing activity). Once they are all lit, you can move on to the next step.
Prepare your computer and connect to insty_connect_setup
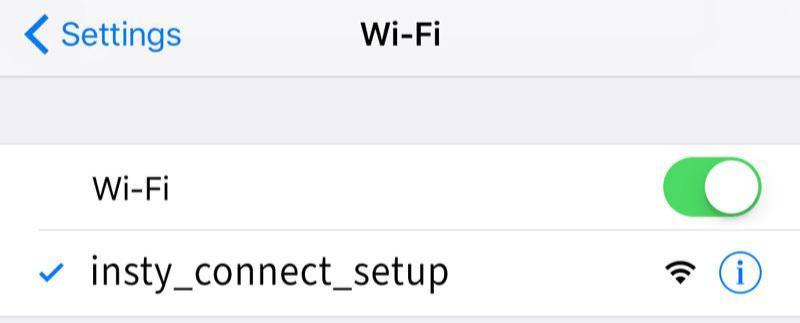
- Go into your device Wifi settings and "Forget" all wifi networks that are around you. (Very Important! We do not want your device linking to any other wifi networks while running the setup procedure)
- After you forget all networks, look for and connect to the insty_connect_setup network. There is no password for this network, so your computer may say 'insecure' - but that is OK. It may also say 'No Internet' while we are configuring the system. This is normal.
**** It's important that you 'forget' other networks. ****
During the setup process, your computer, phone, or tablet may not sense internet (because we are in the wizard) and 'roam' away from the insty_connect_setup wifi network. If this happens while we are saving settings, it may cause the router to freeze and require a factory reset.
We'll cover a factory reset at the end of this document.
Configure the system before full install.
POE Modem Parts (Modem is inside Squared Antenna)
POE Modem Parts (Modem is inside Squared Antenna)
120v Power Adapter with Y pigtail and direct wire cable.
Y to DC Barrel to Molex 4 pigtail for Router Power
The open network created by the router to configure
Page 1
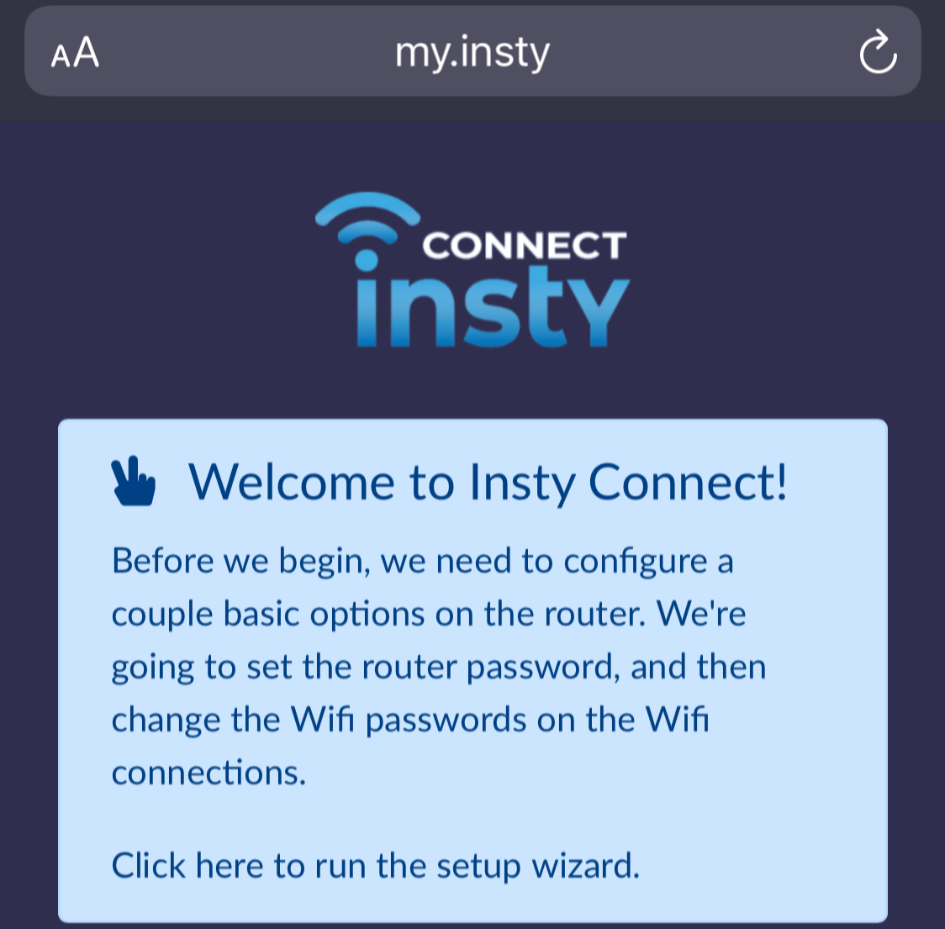
Head to the Insty dashboard and follow the on-screen instructions.
1.) Open Insty Dashboard
Open your phone, tablet or computer browser and type: http://my.insty or you can use the ip address http://10.1.1.1 in your address bar.
(You must include the http:// - not https)
Click the link below the "Welcome To Insty Connect" blue box.
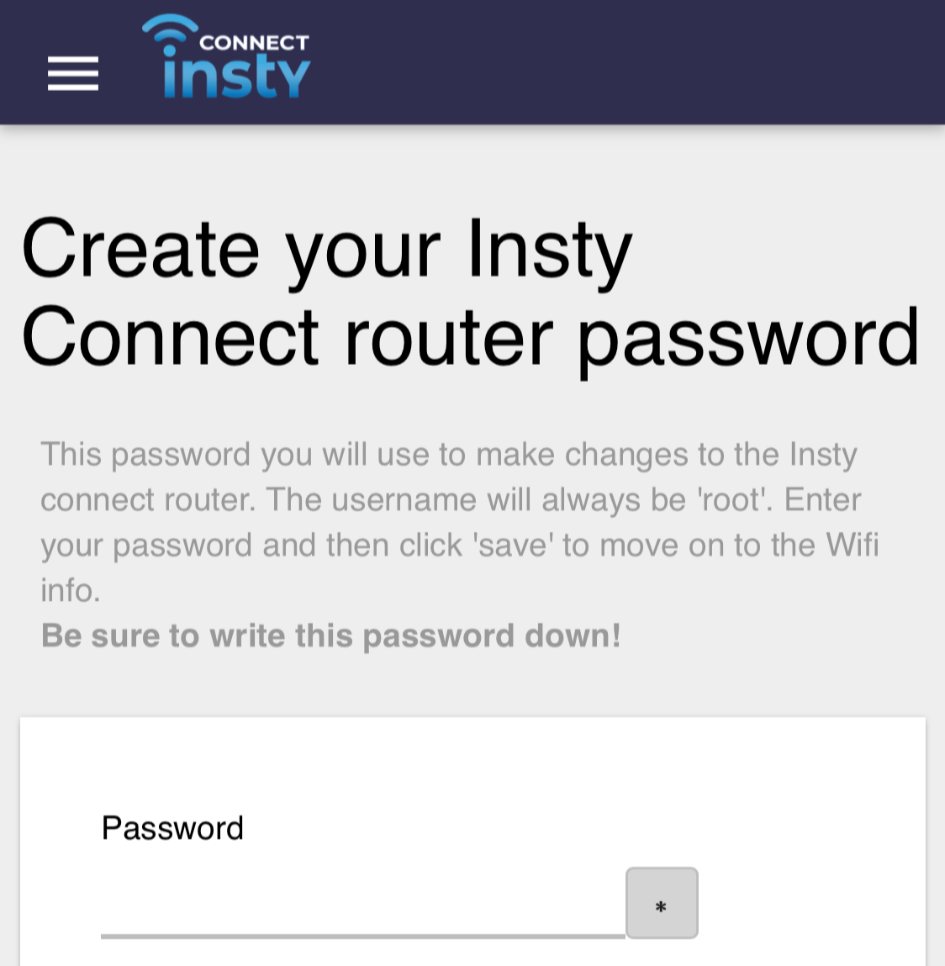
2.) Set your Router Password
Here you will set your router password. Enter your password 2 times and then click the save button.
REMEMBER THIS PASSWORD! You will want to write this down as it will be required any time you make a change to the system.
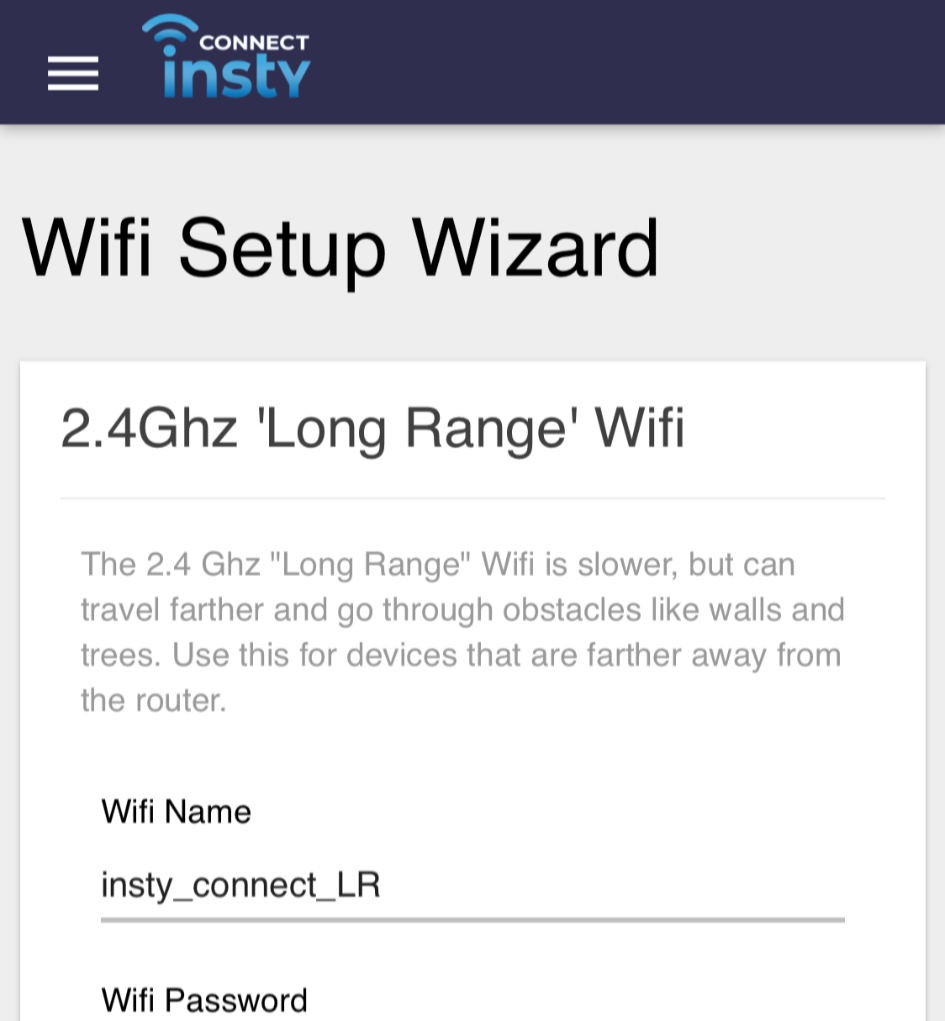
3.) Set your Wifi Info
Name and create passwords for the 2 wifi networks. Do not use spaces in the names or passwords.
This page will also describe the differences between the networks.
You can use the same password as your router if you like.
Click Save after setting the info.
4.) Prepare the modem
** NOTE **
After saving your wifi passwords, the router has to re-start the wifi.
Your device (laptop, phone, tablet) may lose connection to insty_connect_setup while it's being restarted.
During this time, go into your wifi settings and make sure you are still connected to insty_connect_setup, and then return to the dashboard.
After you set your router and wifi passwords, head back to the Insty dashboard at http://my.insty -or- http://10.1.1.1
It should now say "Please connect the modem module ot the Router" - so we can move on!
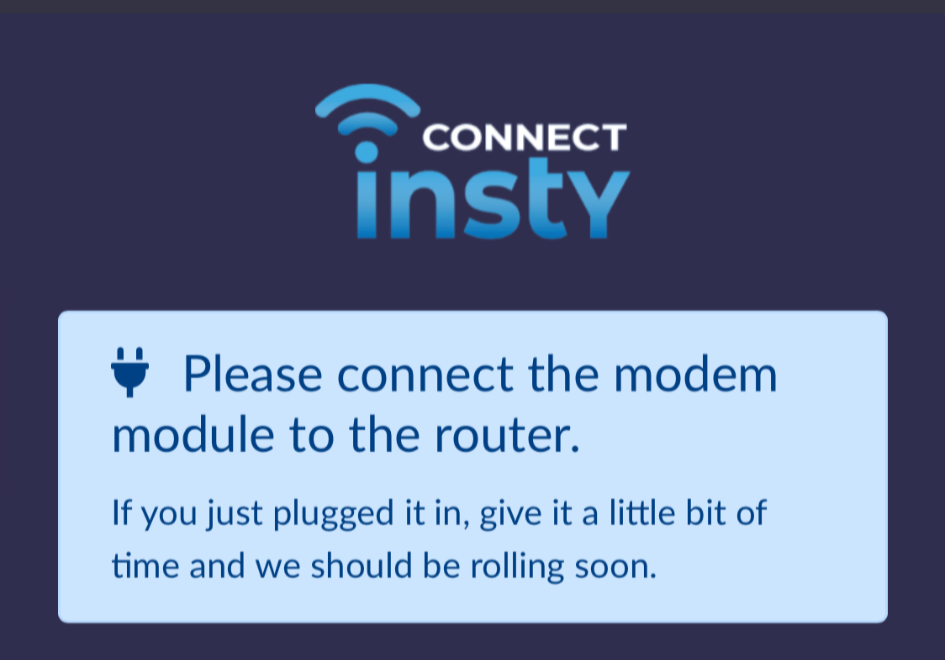
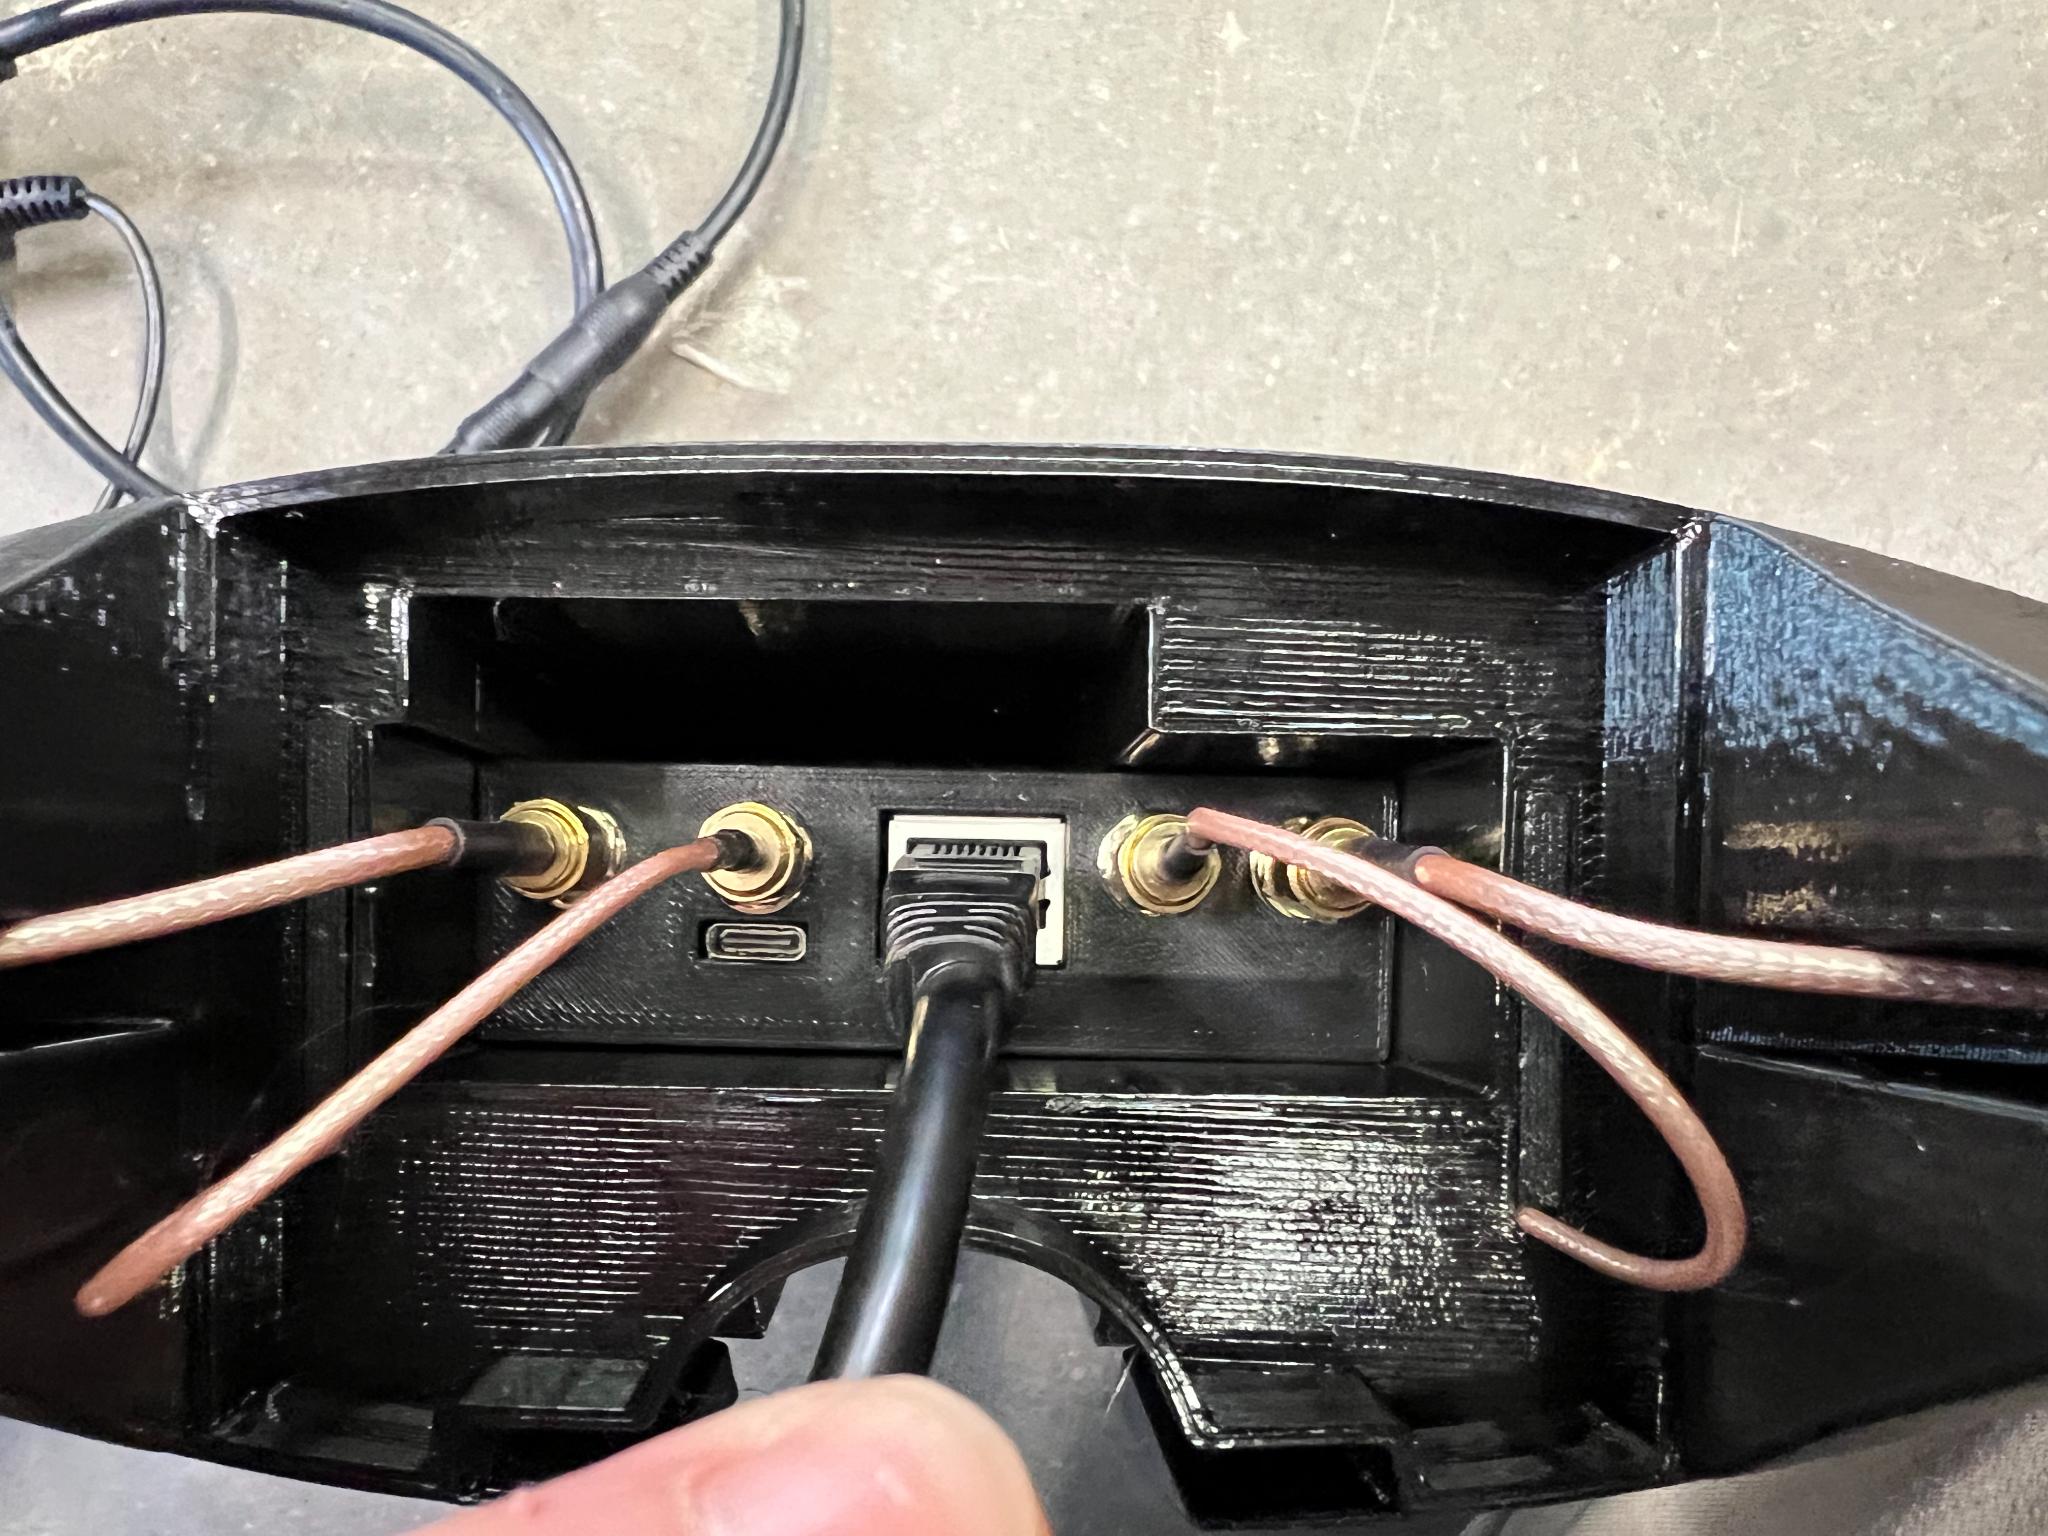
Assemble the Antenna and Modem
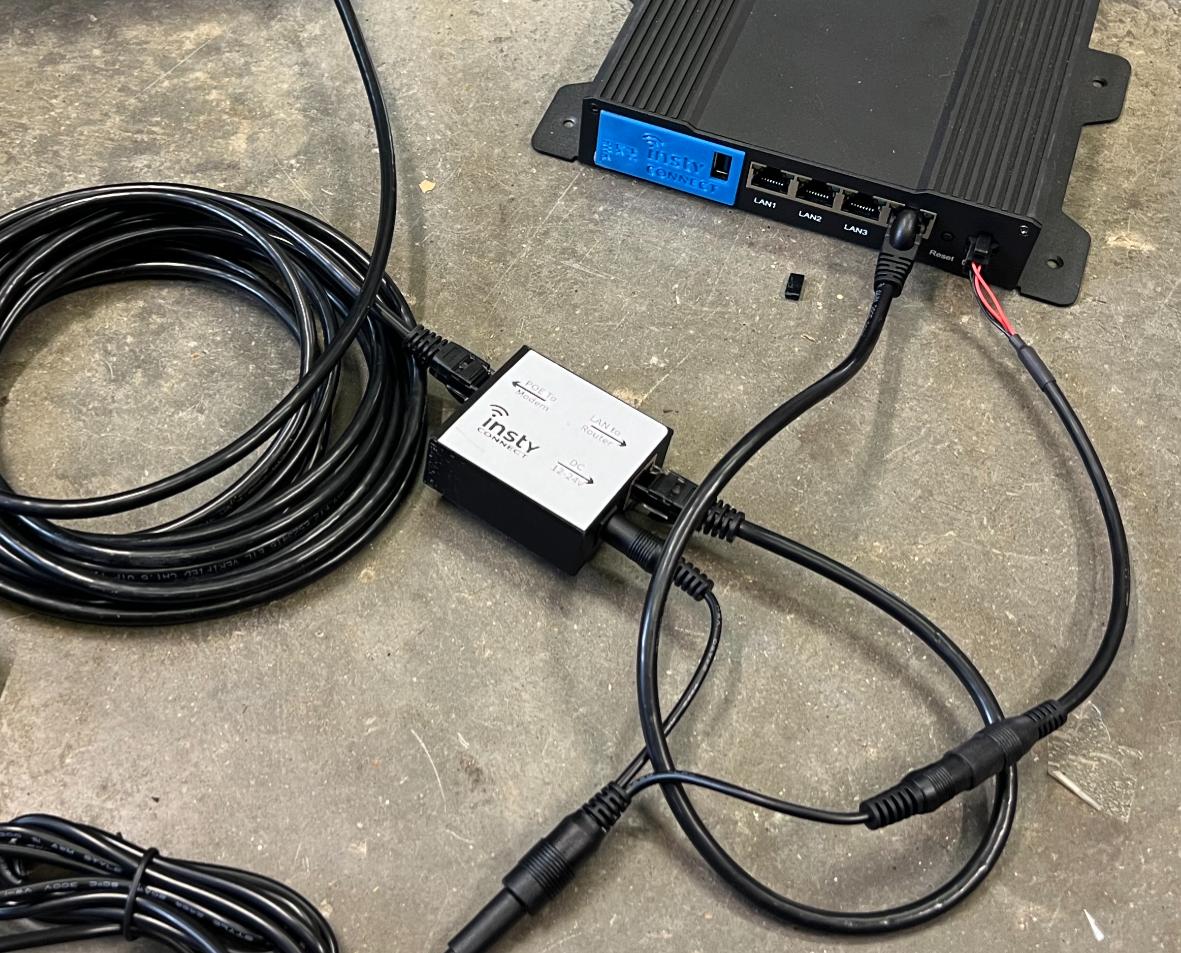
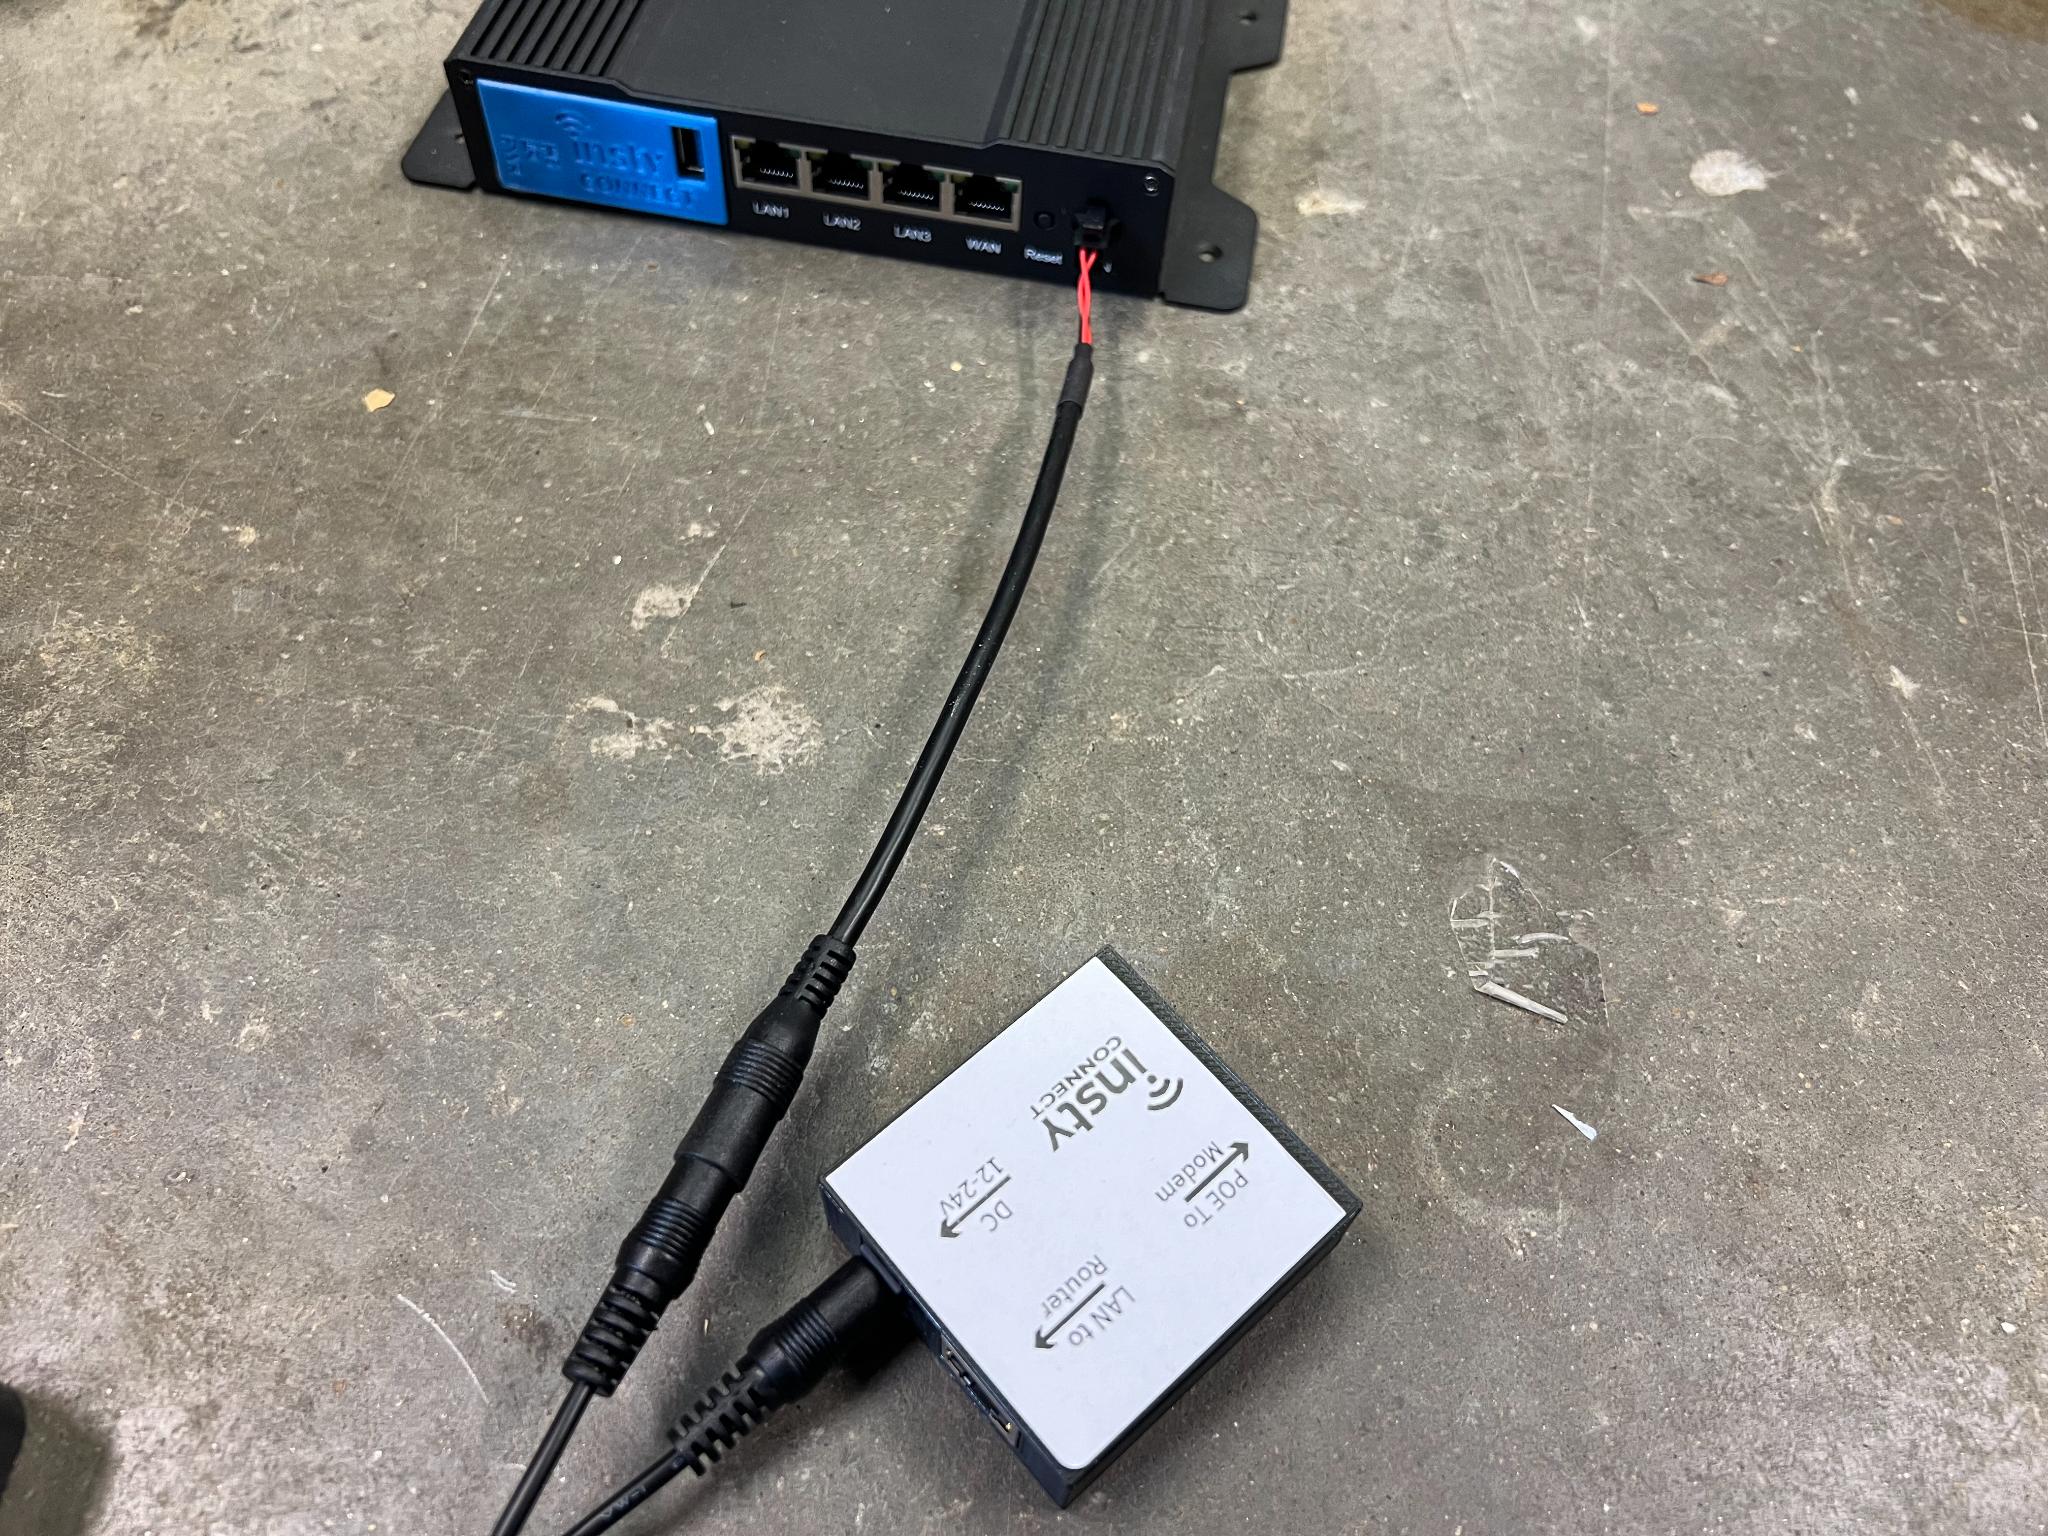
Plug the other DC barrel connectors from the Y pigtail into the POE Injector.
Using the short ethernet cable, plug into the injector labeled LAN to router, and then into the WAN port on the router.
Using the long wire, plug into the injector labeled POE to Modem
The POE Injector with short wire going to the WAN port and long wire to the Antenna.
Page 2
Open the antenna and plug in your data cable.
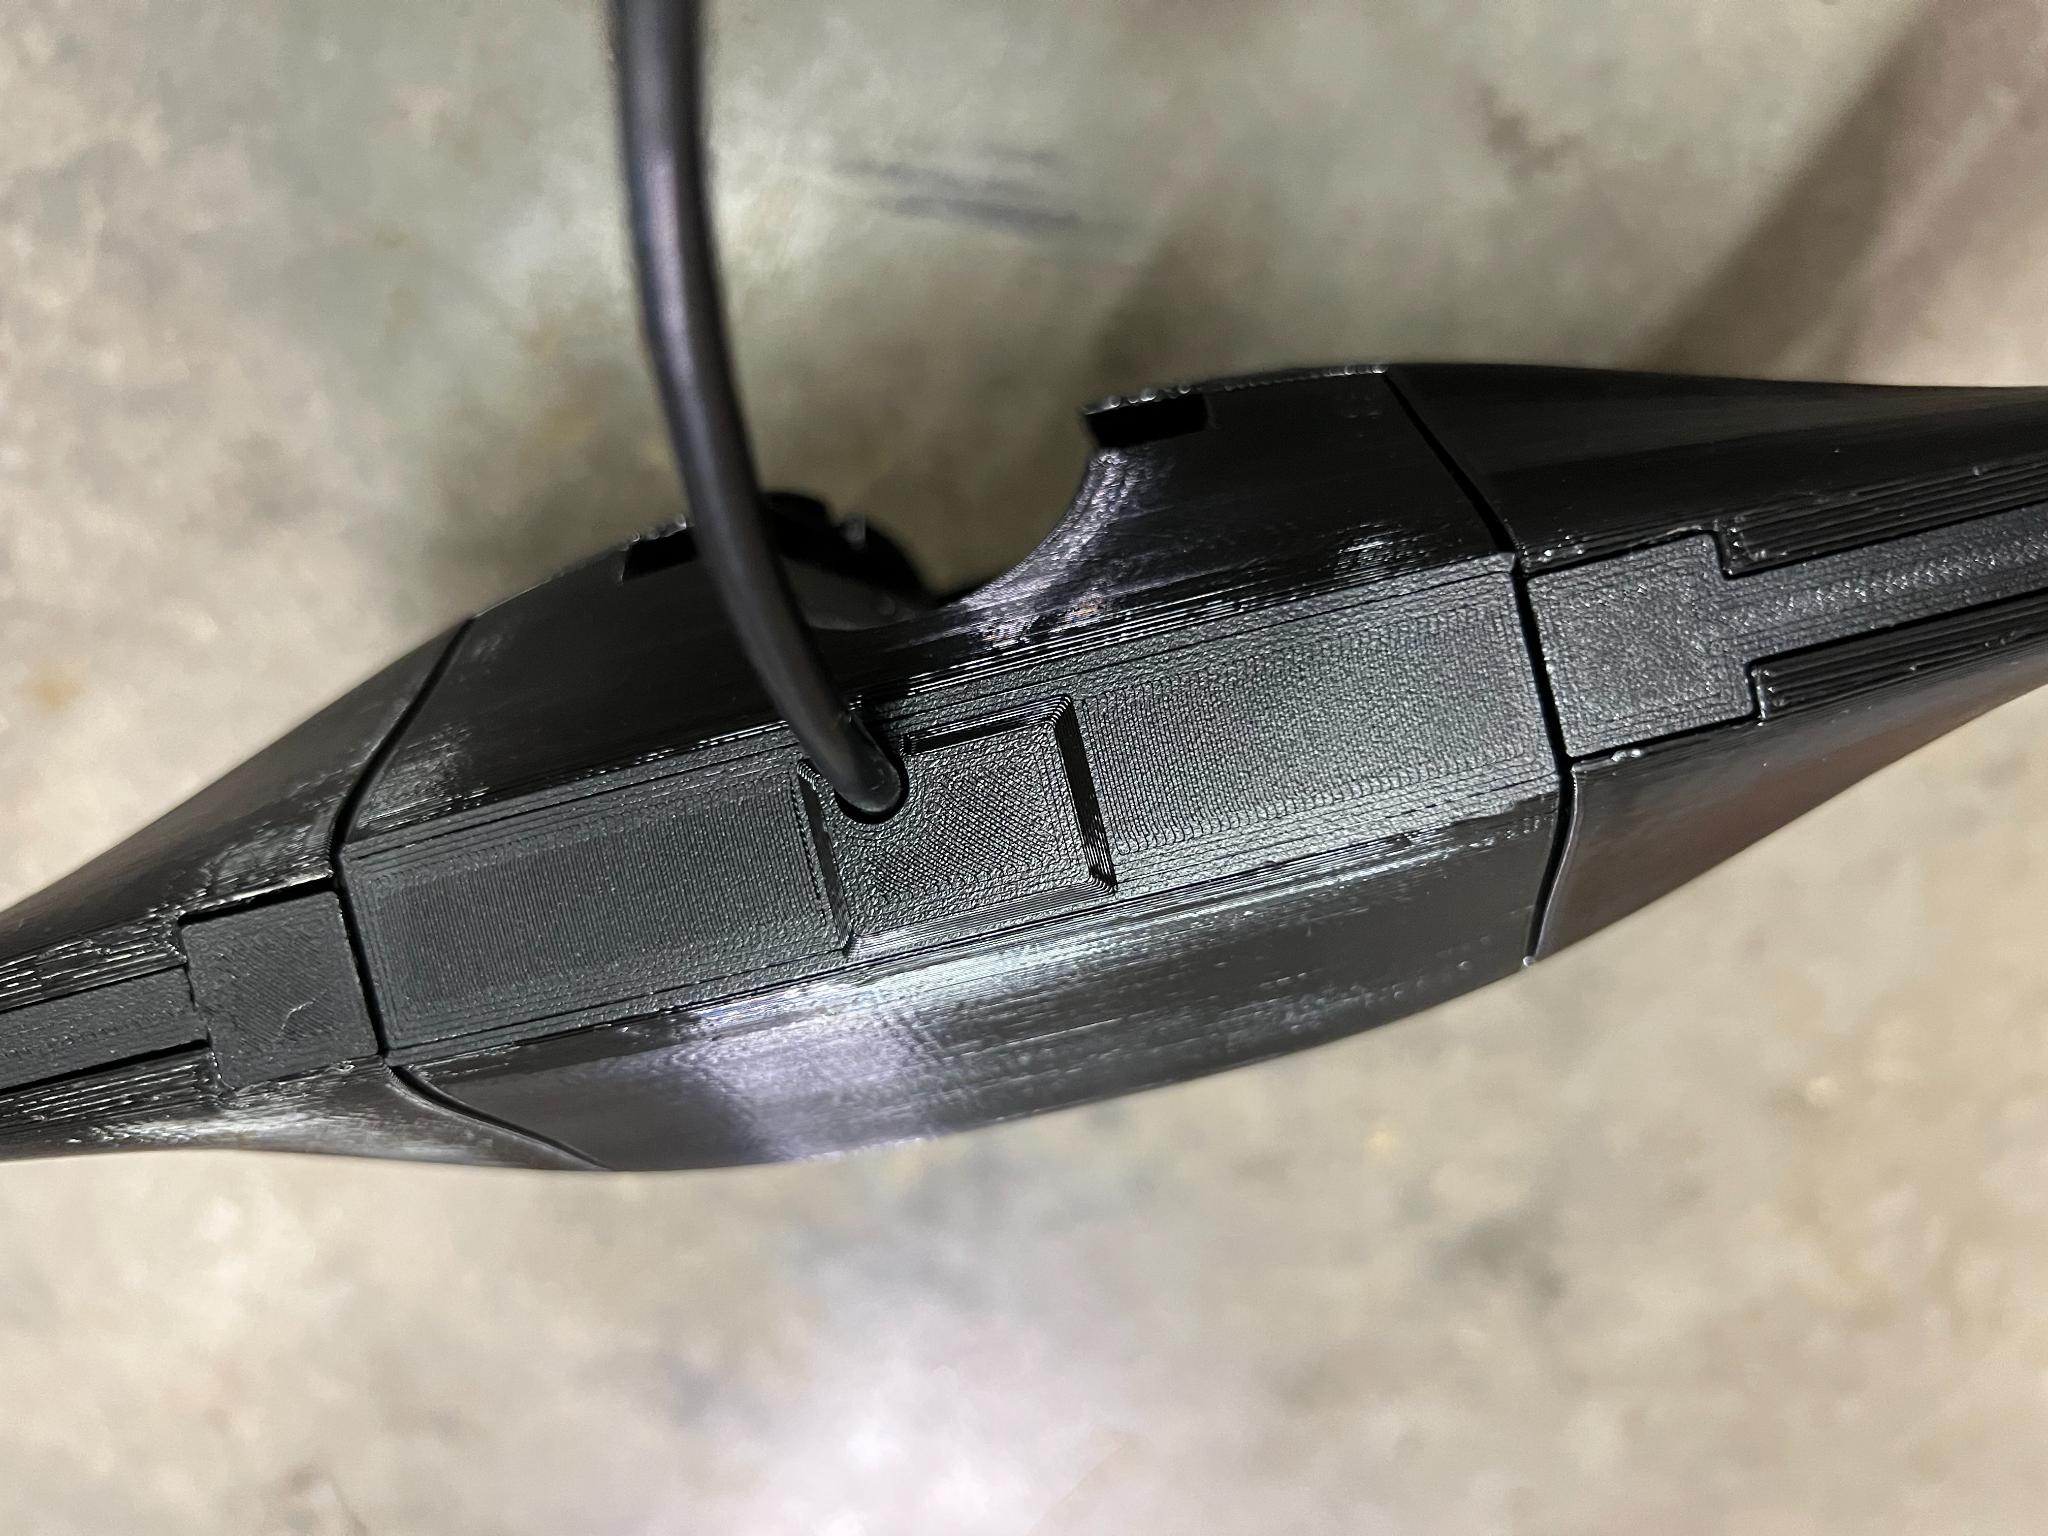
To open the antenna lid, squeeze the back section and pull down.
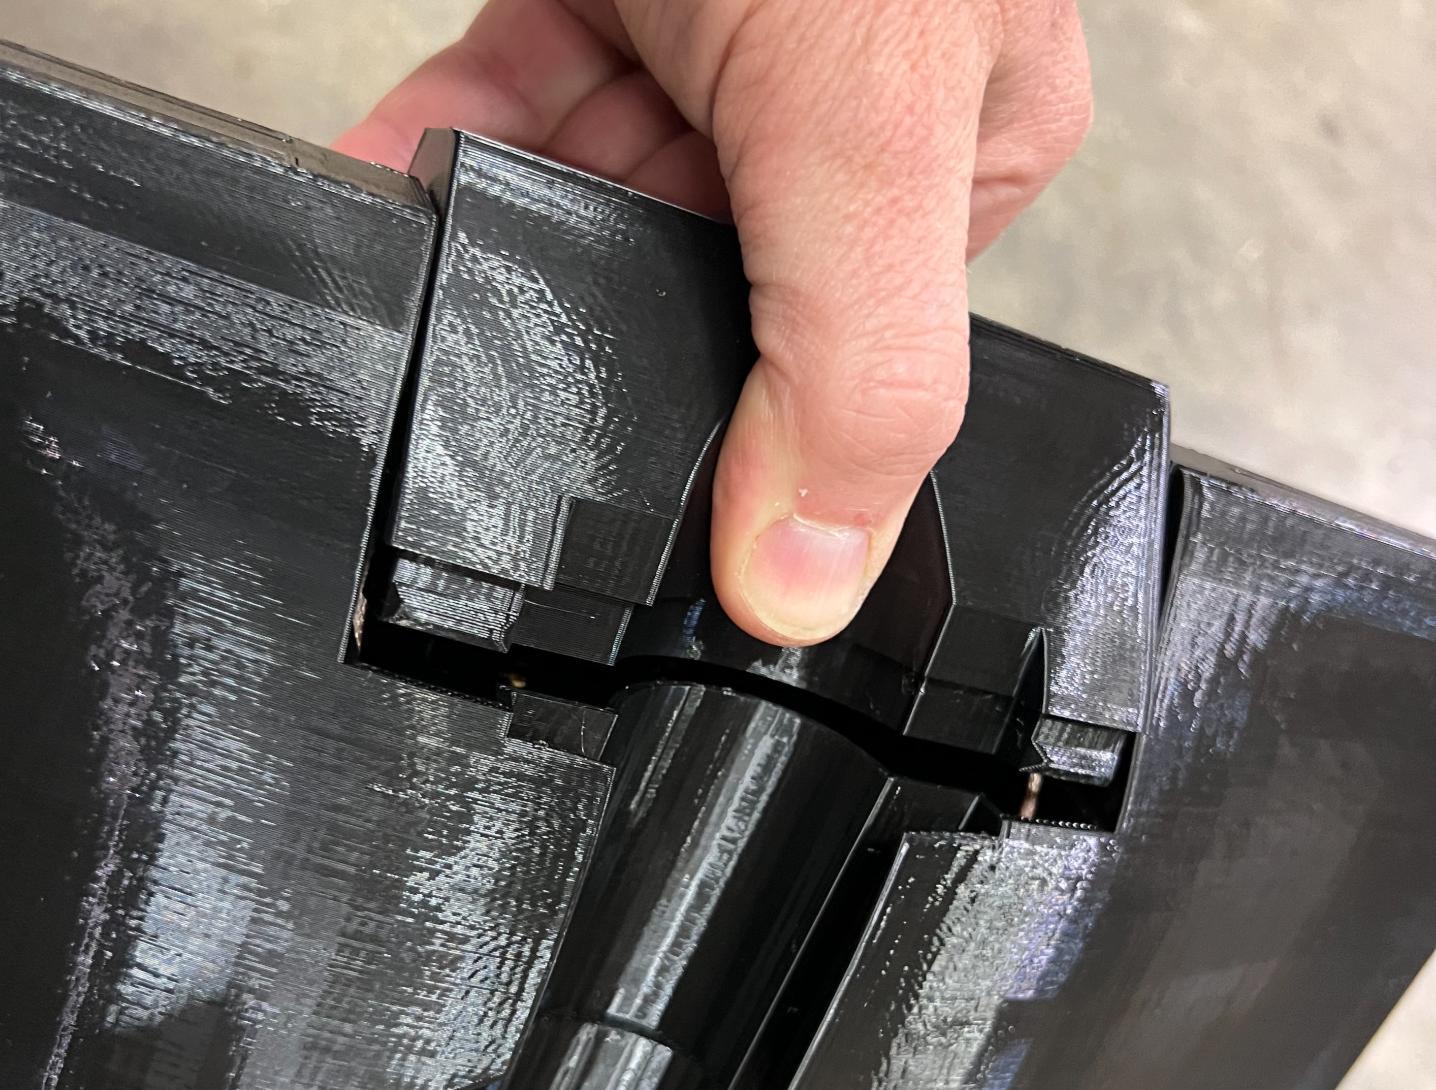
Pop out the wire cap by pushing out from the inside of the lid.
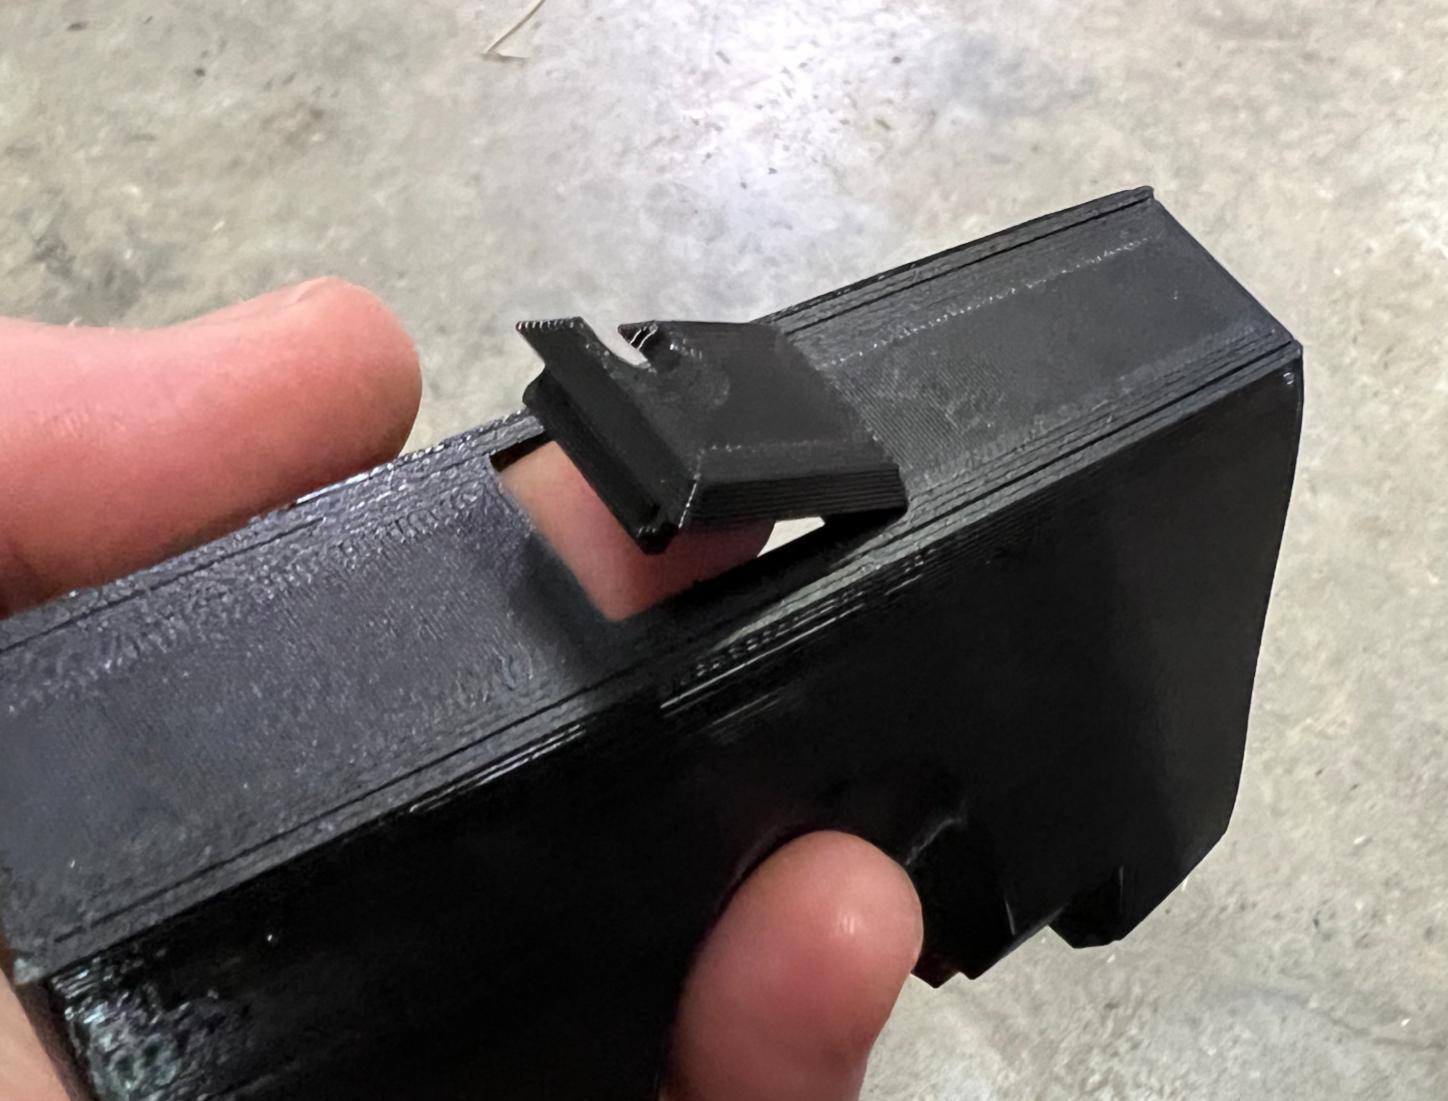
Pass the data cable through the wire supports of the lid.
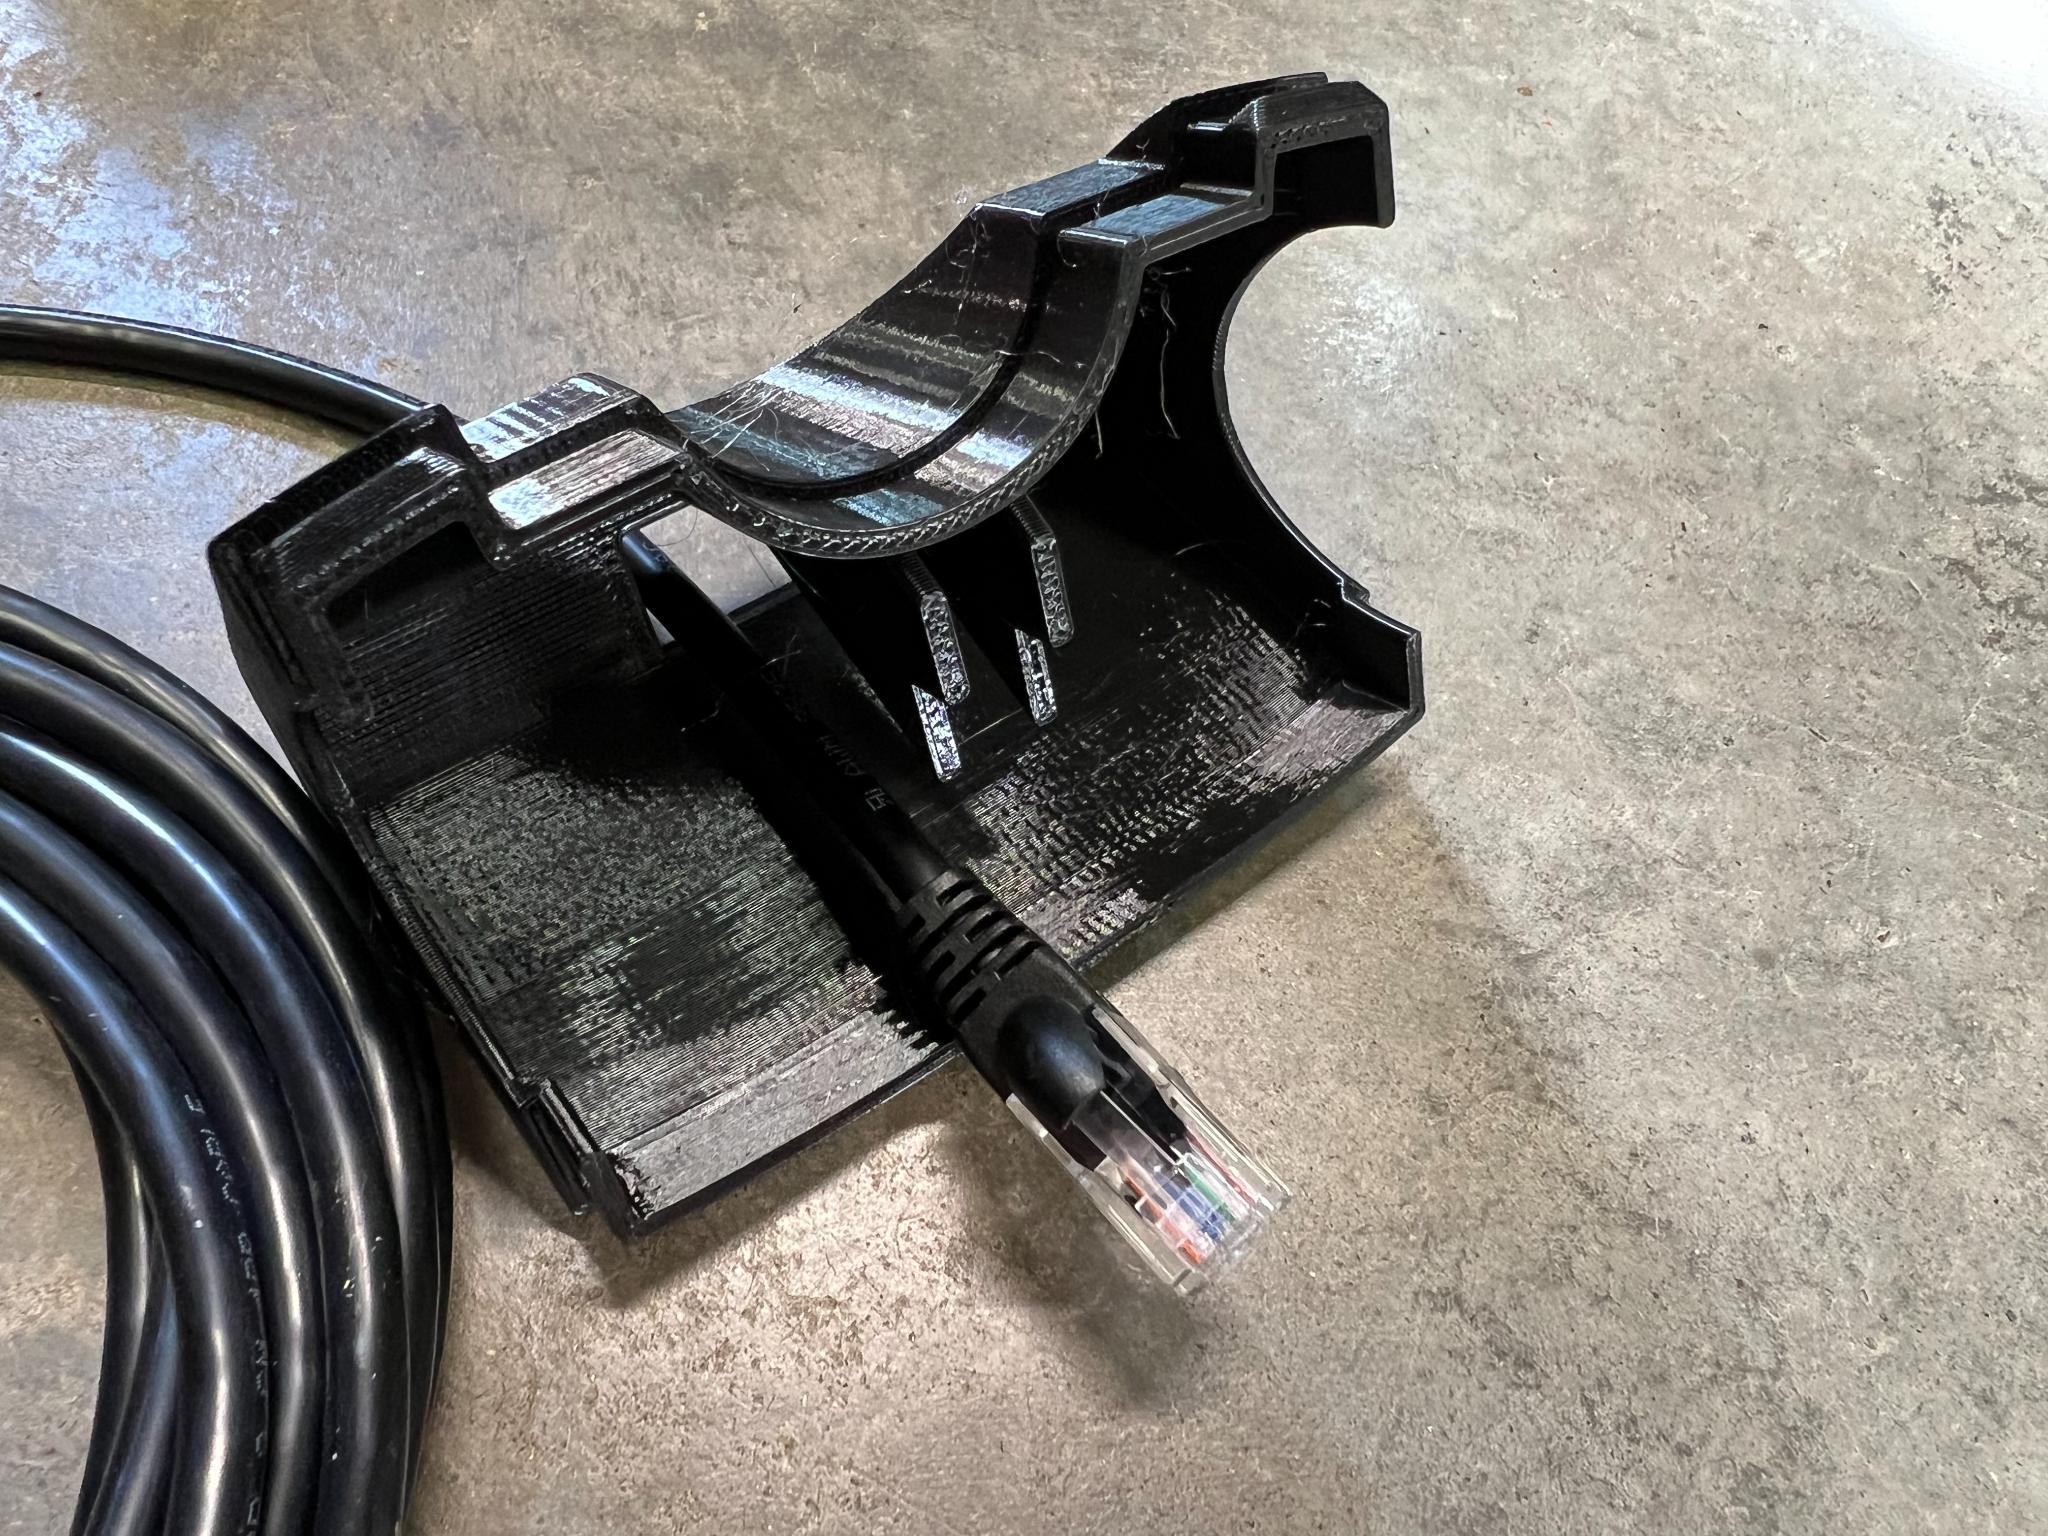
Plug data cable into the ethernet port on modem.
Close lid making sure data cable is still between the wire supports.
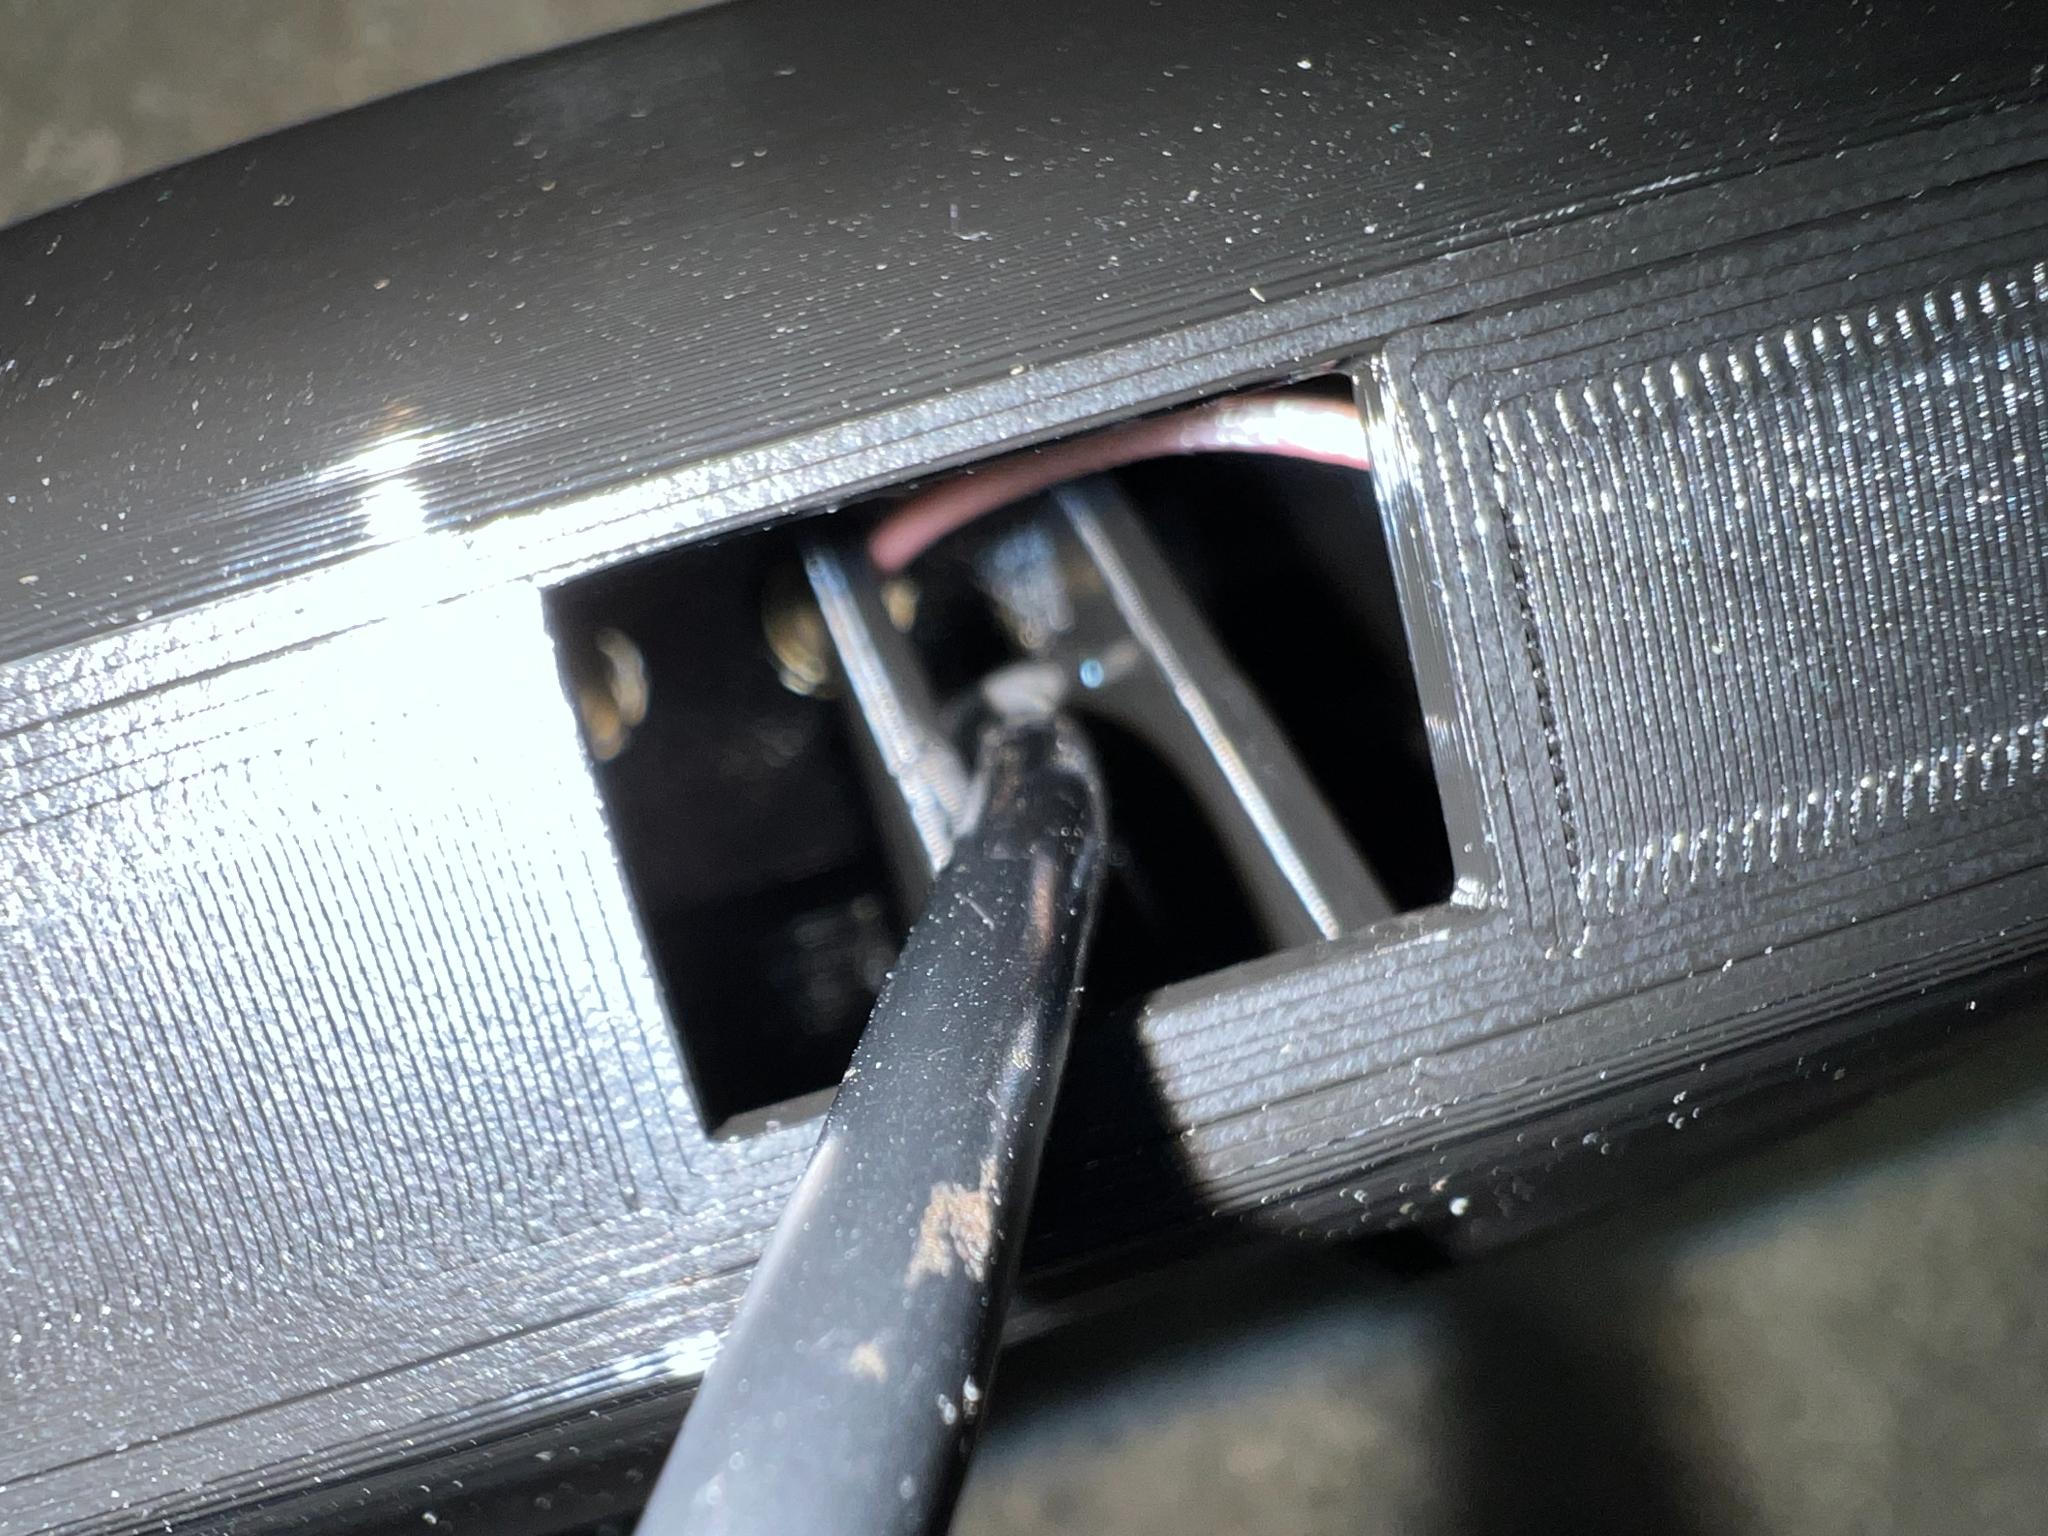
Pop the wire cap back into place.
Head back to the Insty dashboard.
Open your phone, tablet or computer browser and type: http://my.insty -or- http://10.1.1.1
** You must include the http:// - (not https) **
This screen will show you the signal and if you're registered to a cell network.
If you have service through our Insty.Online plans, your system will be automatically configured and active, so you do not need to setup a SIM card below.
You will see information regarding your Insty.Online service with a button to configure your options.
If you need to setup a separate SIM, see below.
Configuring a SIM card.
From the main dashboard, click the 'Current LTE Sim Profile' button.
You can then set the name of the SIM for your reference and select the provider of the SIM. If the provider is not listed, select 'Other' and fill in the APN for your provider. Contact your provider for the proper APN to be used.
As a general rule, IP Version IPv4 & IPv6 should be used as default unless instructed by your provider.
You can also set a TTL to be used with this SIM profile, default is 0 which no TTL adjustment is being made by the modem. (See our KB article for more information about TTL settings).
Click Save when complete. The modem will then reboot with your SIM settings.
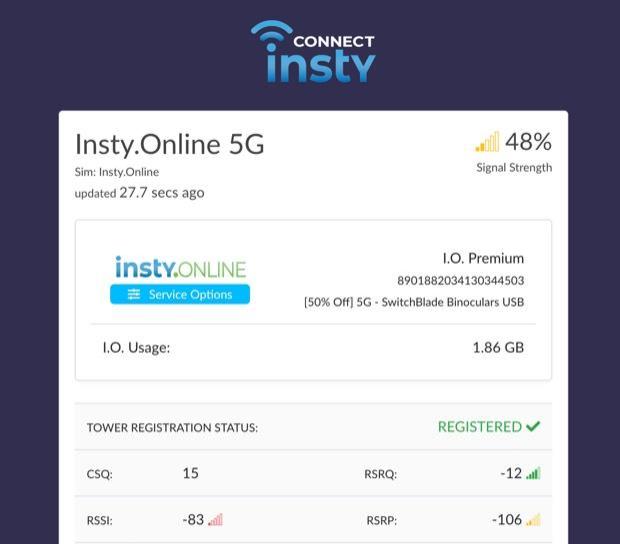
The Insty Dashboard with Insty.Online setup and configured.
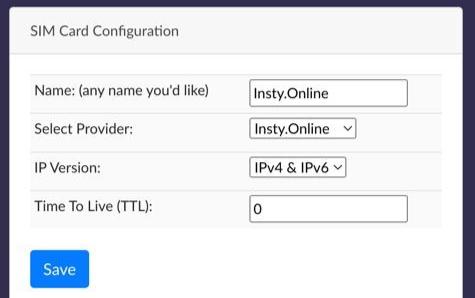
Setting up your own SIM from within the dashboard.
Page 3
Cleaning Up!
Now that we've configured your Wifi networks and have confirmed an internet connection, we can remove the open wifi network, insty_connect_setup.
If your internet is not working, check out the troubleshooting steps below.
- Disconnect from the insty_connect_setup network by connecting to one of your Wifi networks that you created in the steps above.
- On the dashboard, click 'Finish Wizard and Remove Open Wifi Network' to remove the insty_connect_setup network from your router.
- * IMPORTANT * - Click the 'software update' to get the latest software.
- Reboot and enjoy the latest and greatest Insty Connect!
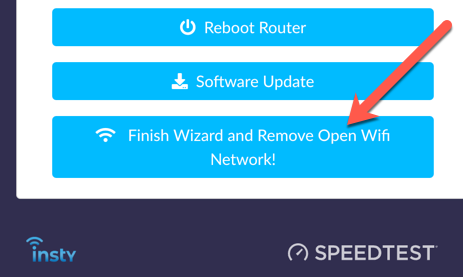
Remove open network, then run the update!
Troubleshooting
Connectivity Issues:
If you have Insty.Online and do not have a connection to the internet, please check your signal in the dashboard to make sure you are registered on a tower.
If you are registered on a tower, send in a message to support to have us verify your service is active and online.
If you are using a "bring your own sim" and have no internet, check your SIM card settings to make sure the correct provider and/or APN is being used.
If you are registered on the tower and have no internet, you will need to reach out to your provider to confirm your service is active and online.
If you have any other issues, we've put together easy to follow articles in our knowledgebase to help with any issues that may arise:
https://instyconnect.com/troubleshooting
If you run into something that you can't find in our knowledgebase, you can reach out to us by using the info below.
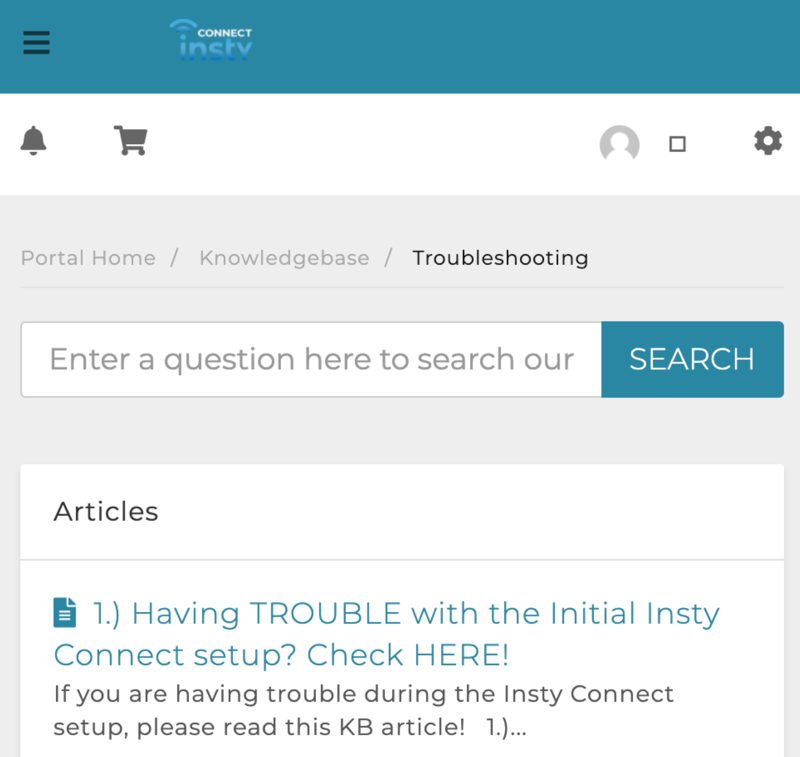
Our searchable Knowledgebase
Contact Us:
To contact us, visit the main website: https://instyconnect.com
In the menu, click Help -> Contact Us.
From our family to yours.
Thank you so much for your purchase of an Insty Connect! You are supporting a family-run small business and we really appreciate it! We hope you love this device as much as we’ve loved putting it together for you.

Page 4